Tree in the mountains: lessons learned from my first diorama
At some point, you have to take the plunge. That’s what I told myself when I decided that, instead of binge-watching diorama videos on YouTube, I’d try to create my first diorama.
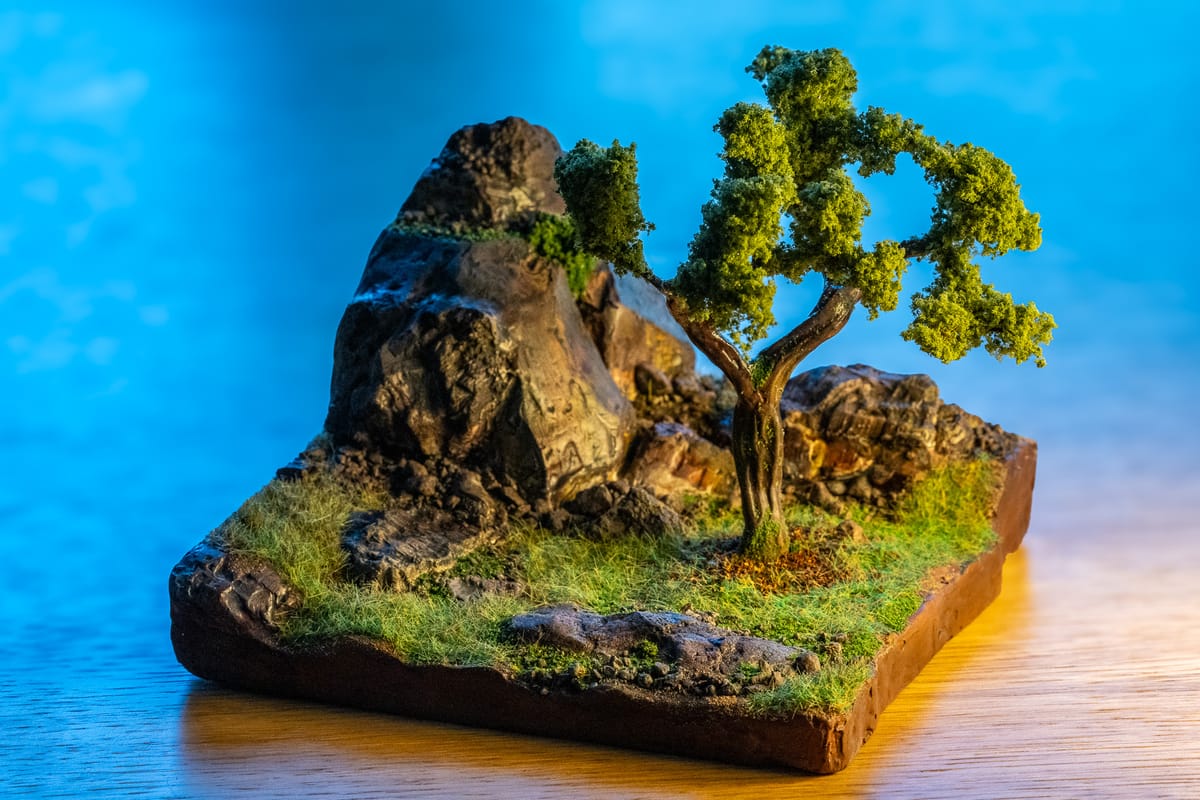
It all started with a tree!

I spent quite some time creating it.
When it was done, I thought it needed a landscape to live in.
That’s when my first diorama took form.
Of course I made mistakes along the way, even as I followed the best tutorials I could find to help me build it.
I’m sharing them here for anyone starting out, so that you get a head start for your first diorama. It’s also a great way for me to document my learnings and use them in my next builds.
Or maybe you can tell me what I could have done better, too 🙂
At the very end of the post, you’ll find the list of materials I used for this project.
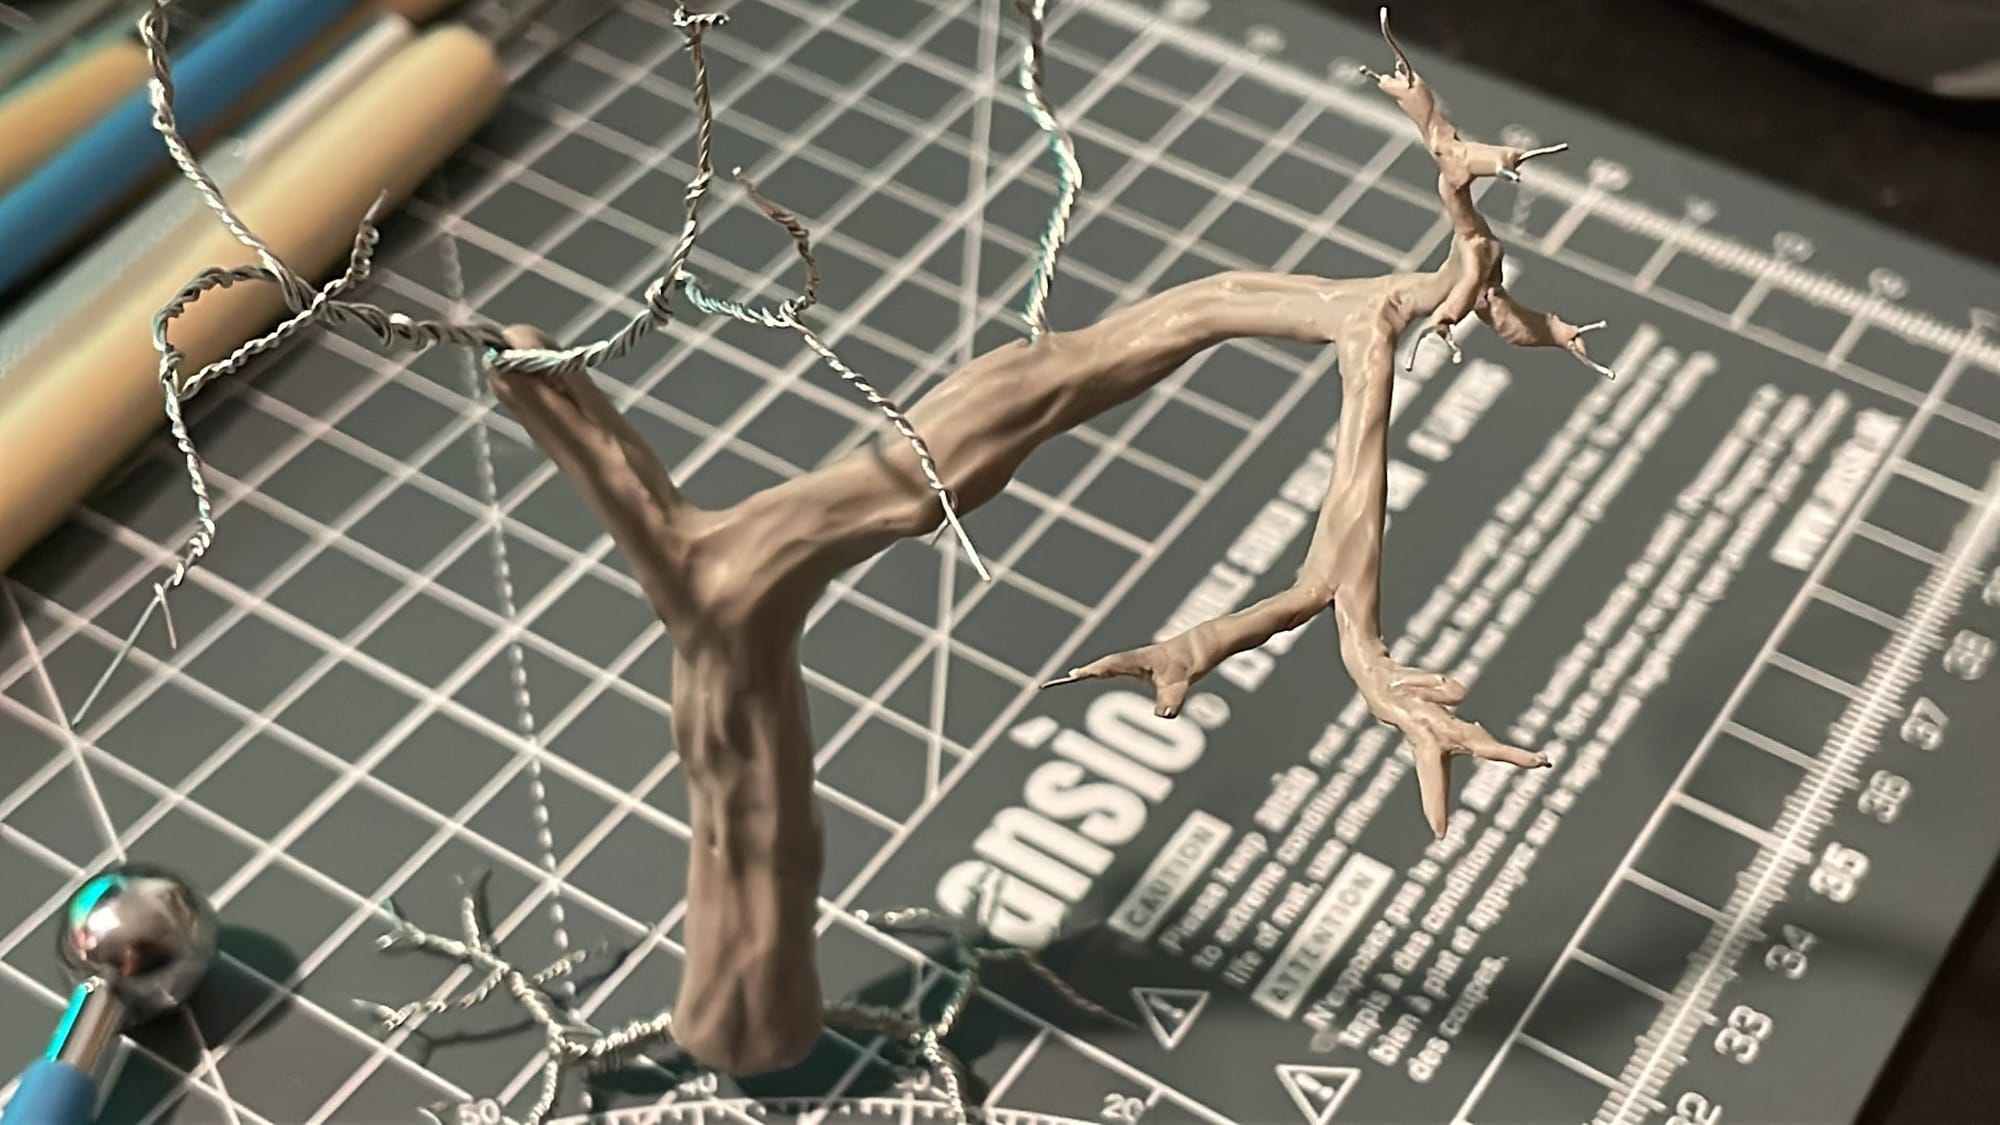
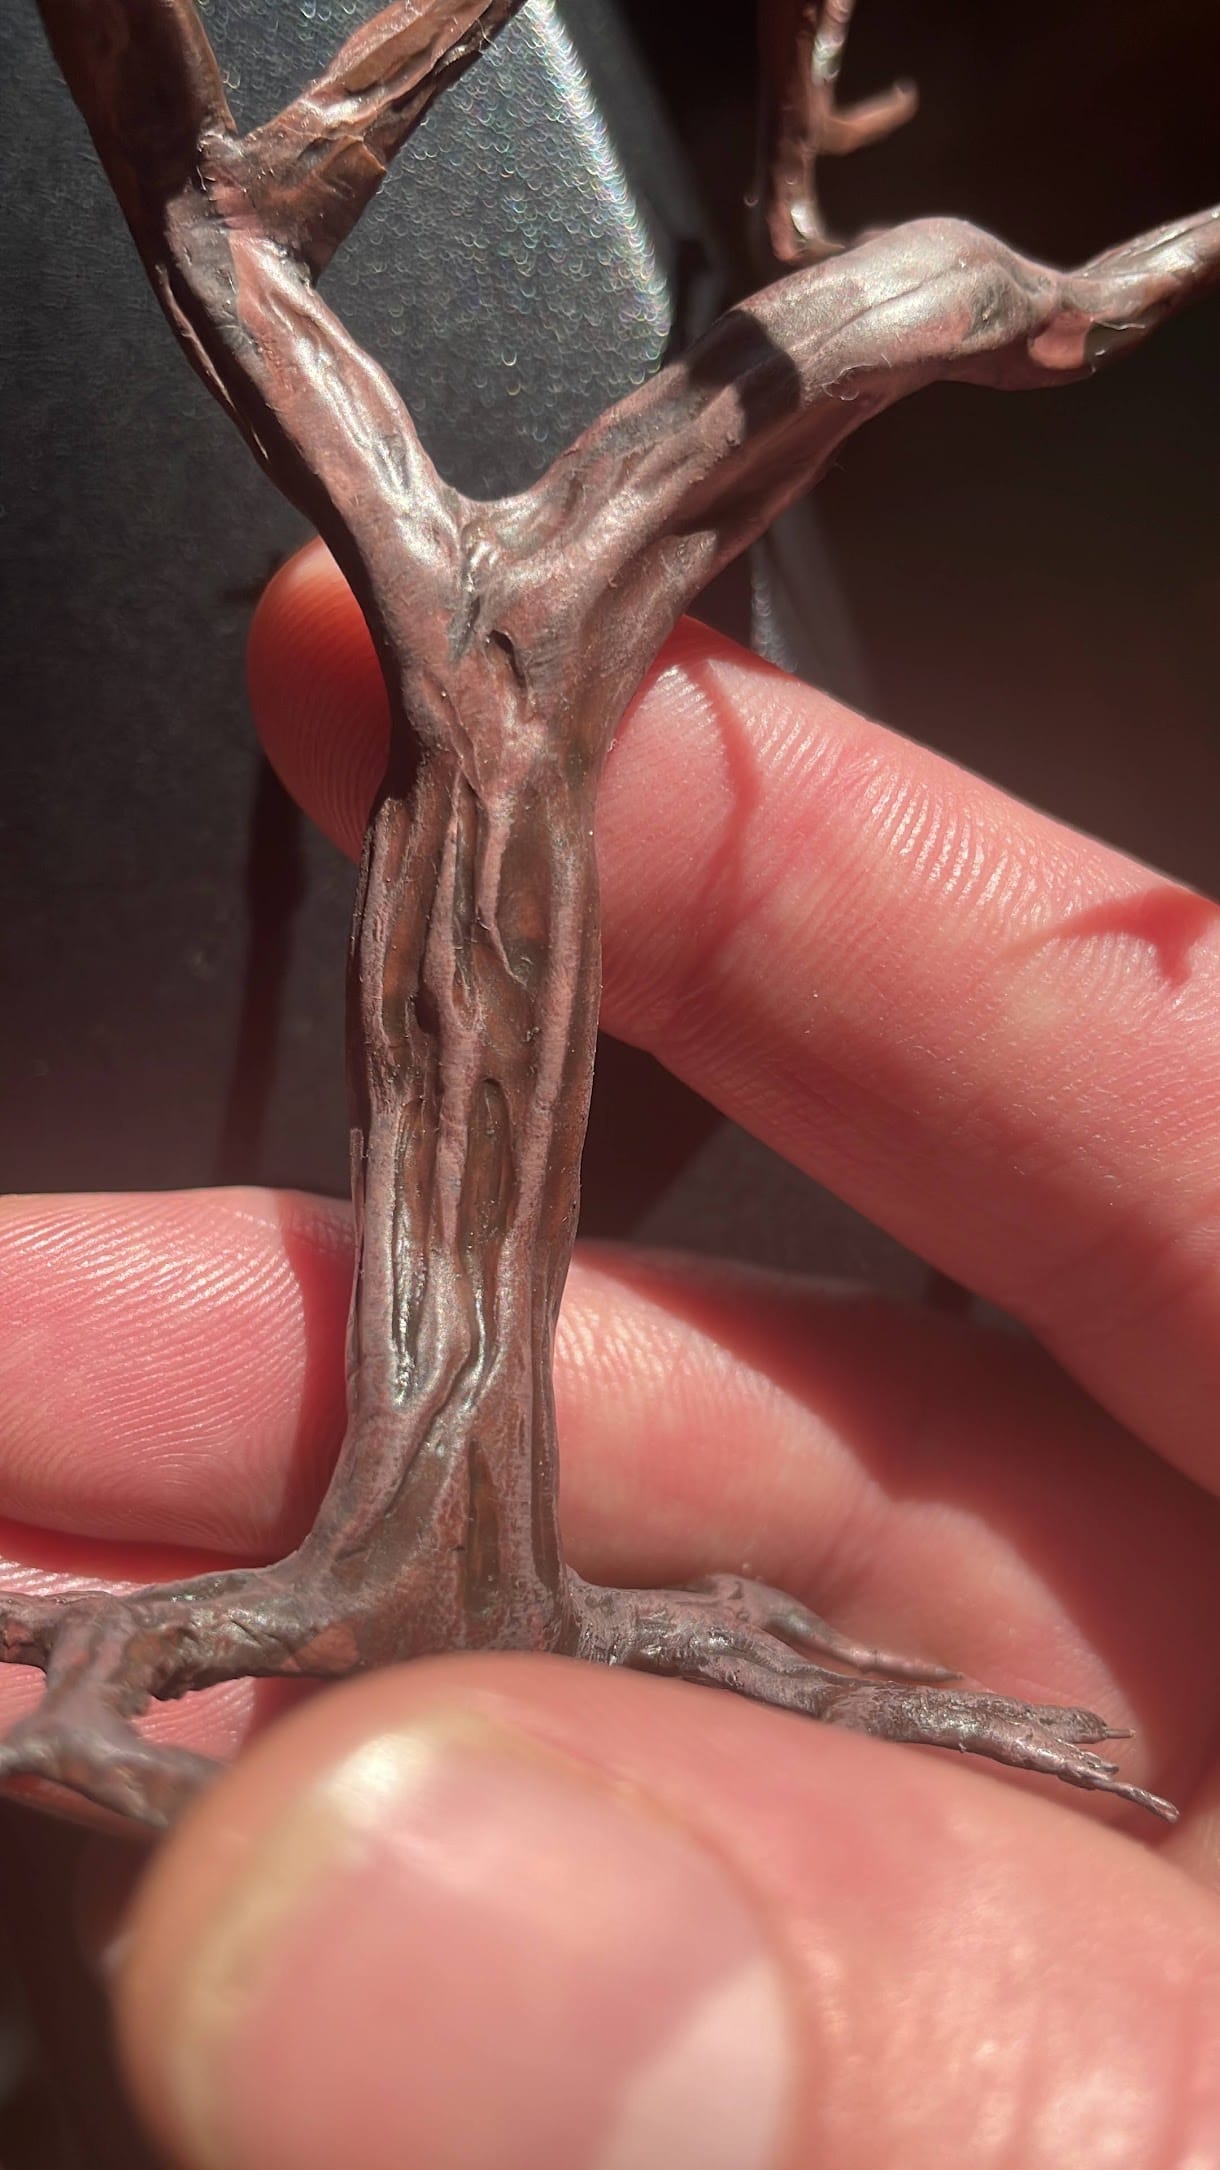
The tree
My tree is made of twisted wires, on top of which I have used polymer clay (Super Sculpey medium) to sculpt the trunk & branches, and flock to make the leaves.
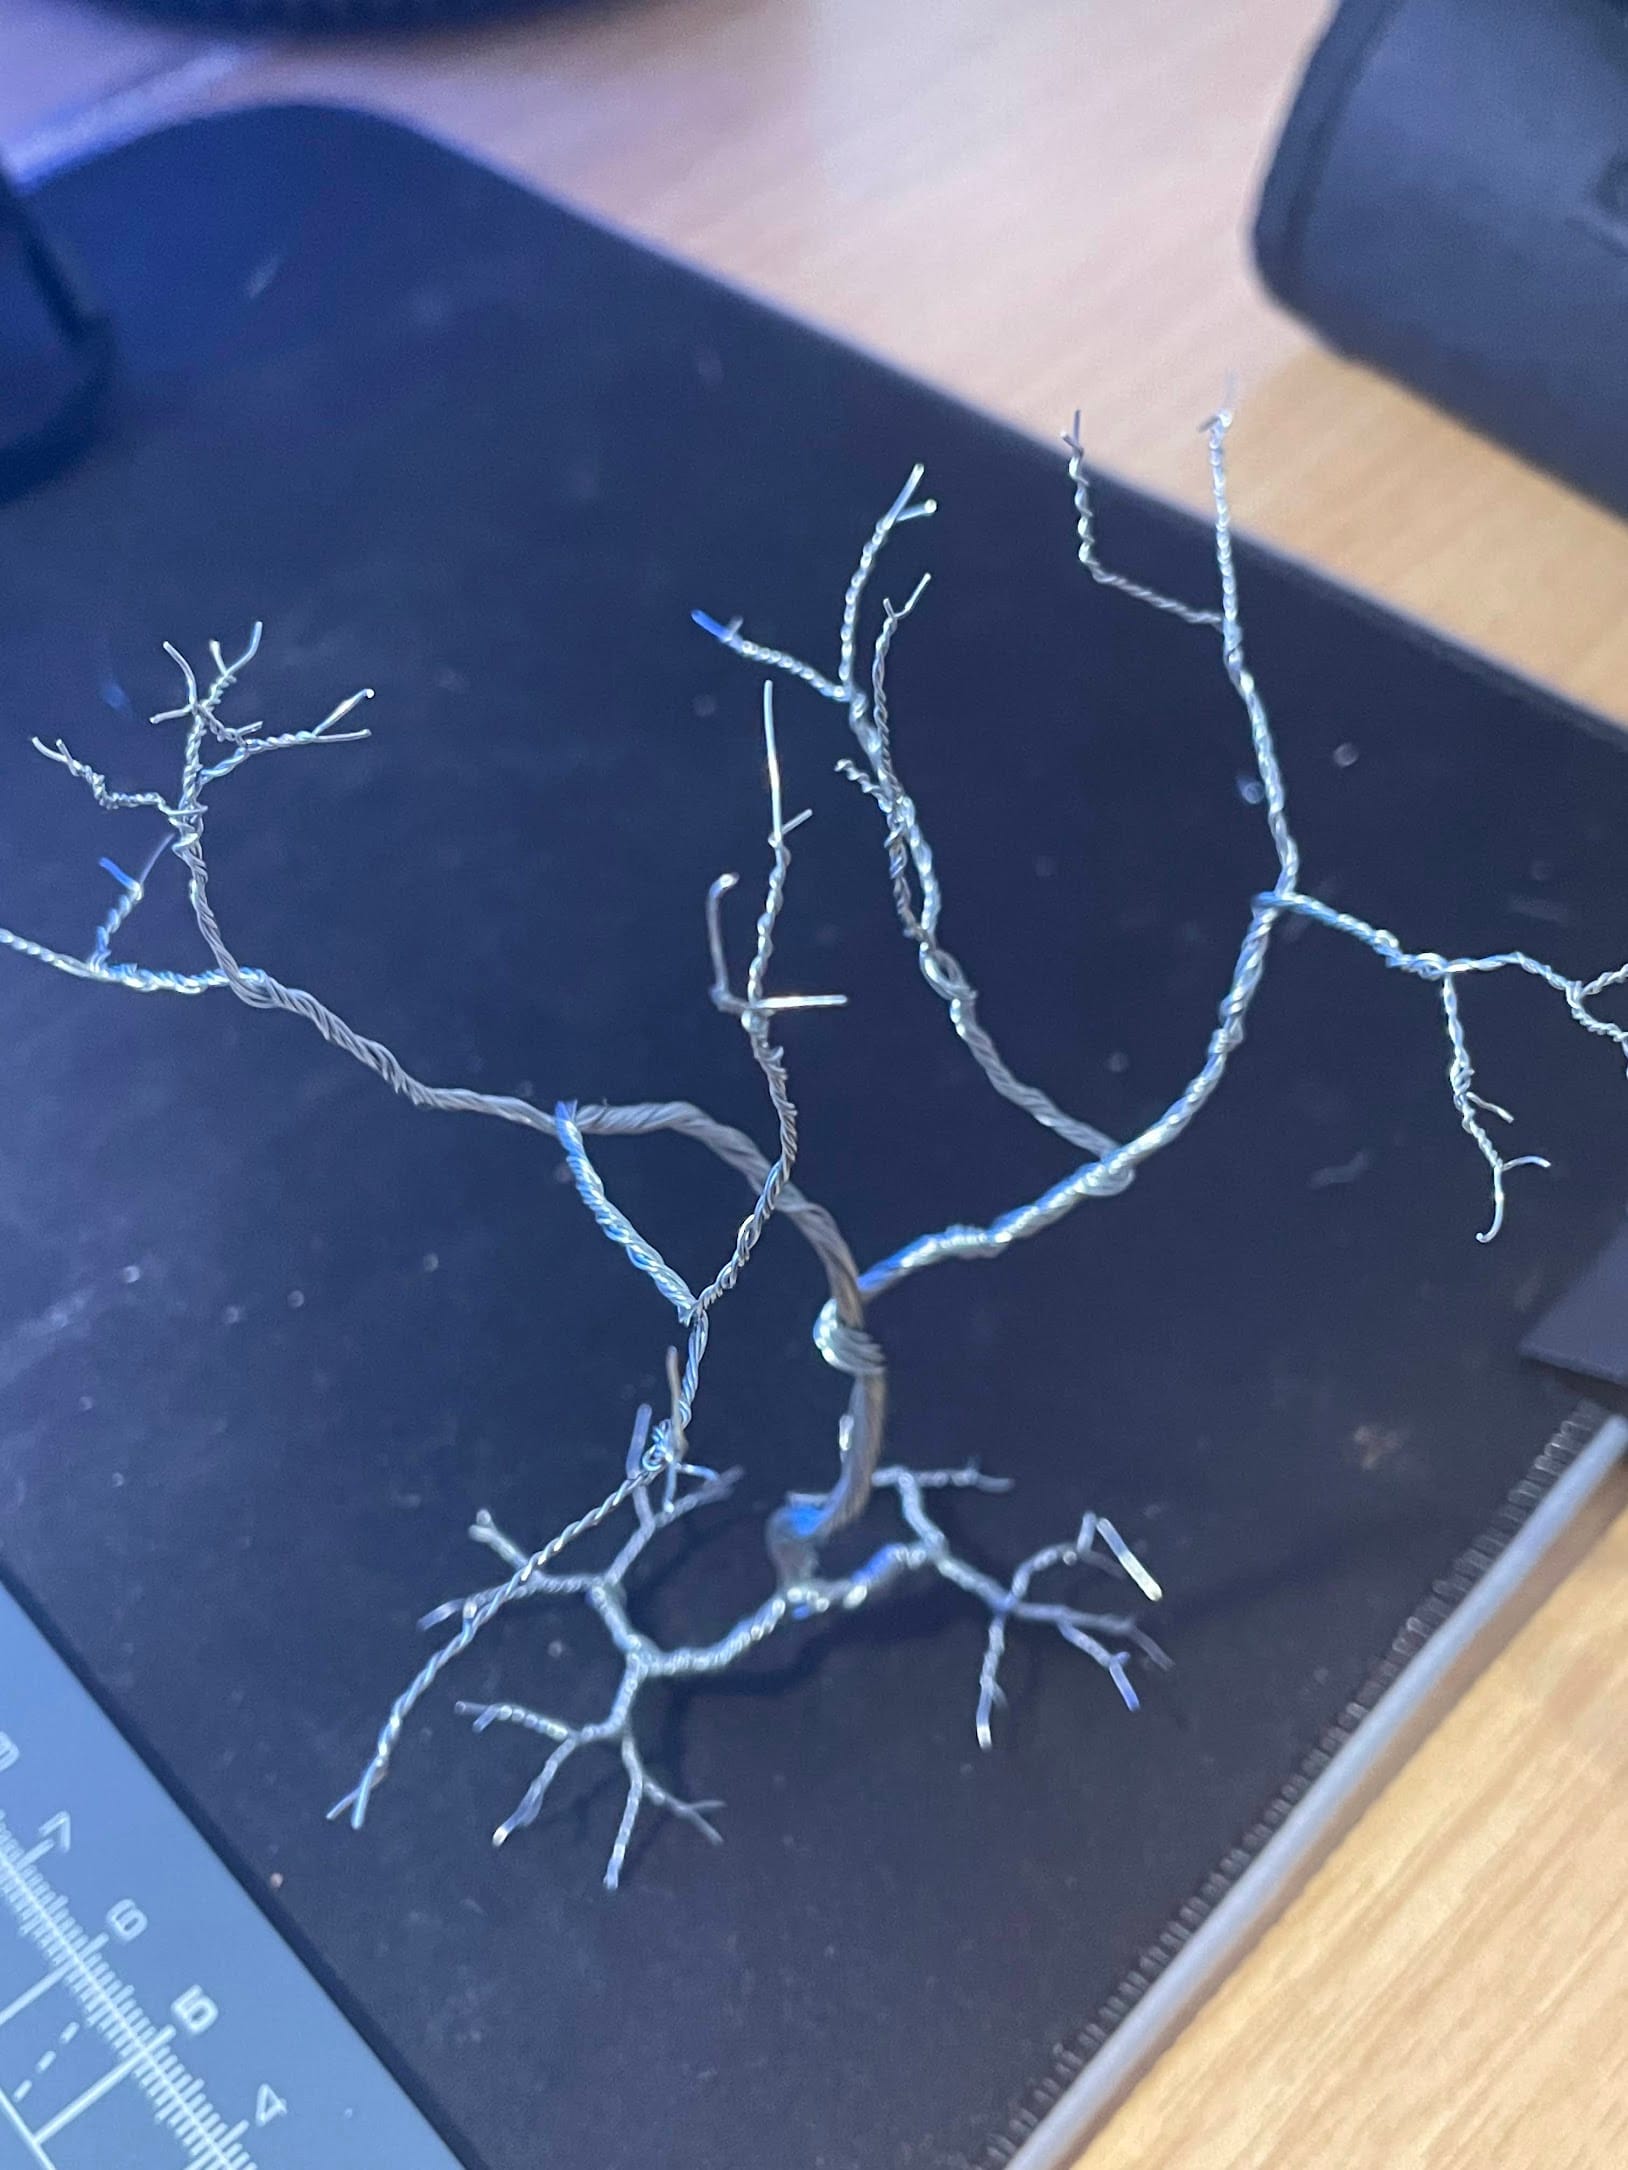

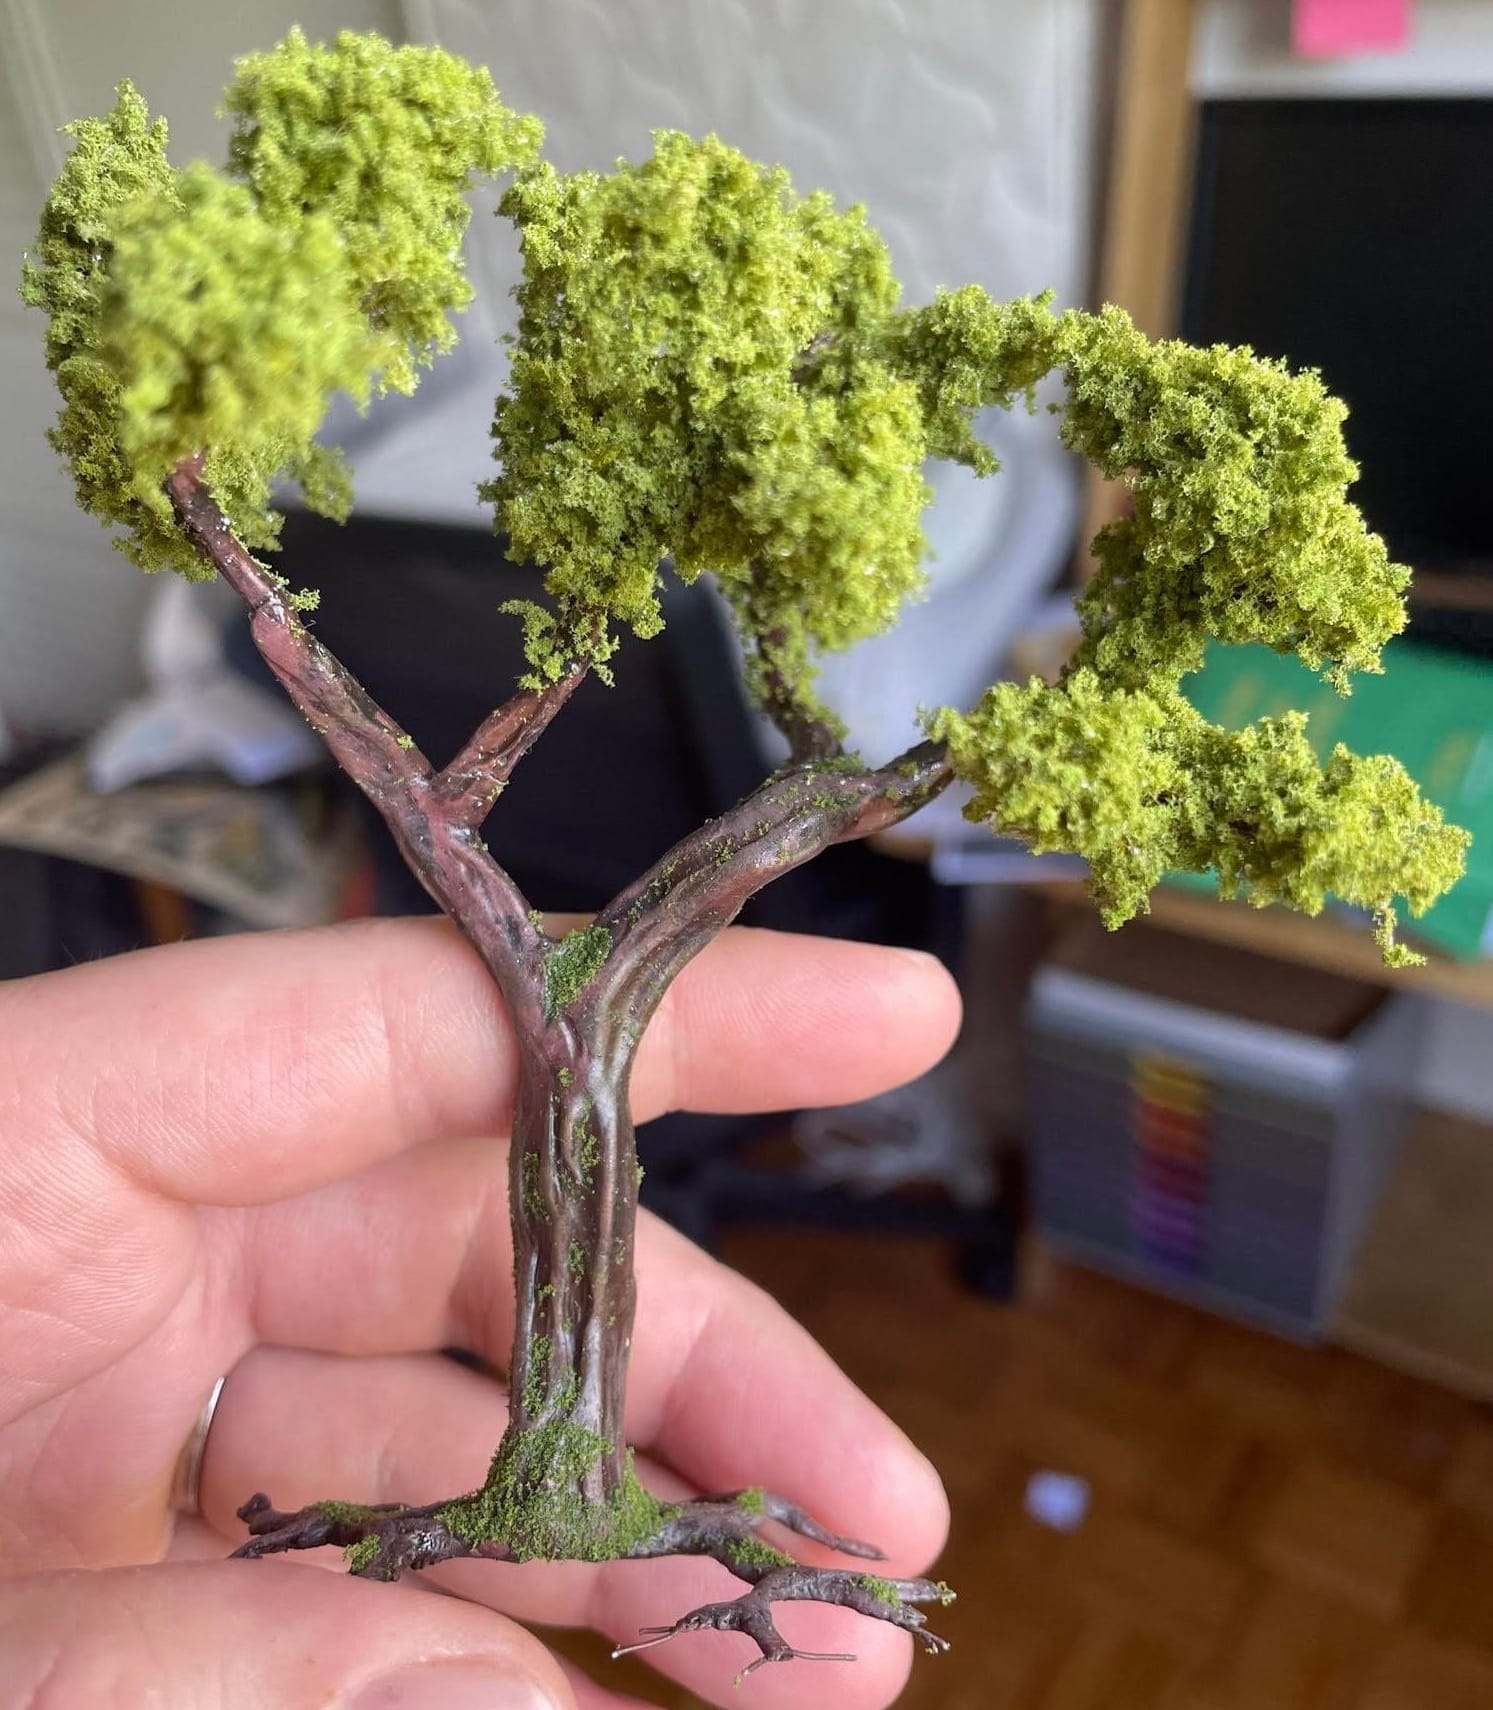
From twisted wires to tree…
I have spent a ridiculous amount of time putting Sculpey on the smaller branches, trying to get them thin enough while holding firmly on the wires.
Don’t do that, it’s all useless 😅
As everything this size gets covered with flock afterwards, you don’t need those fine details. Next time, I’ll probably just prime & paint them brown after the clay is baked.
Still, it was entertaining to craft this tree, and I learned a lot following Luke Towan’s tutorial.
There are things, though, that I’ll try differently next time:
The leaves “clusters” of my tree look two-dimensional
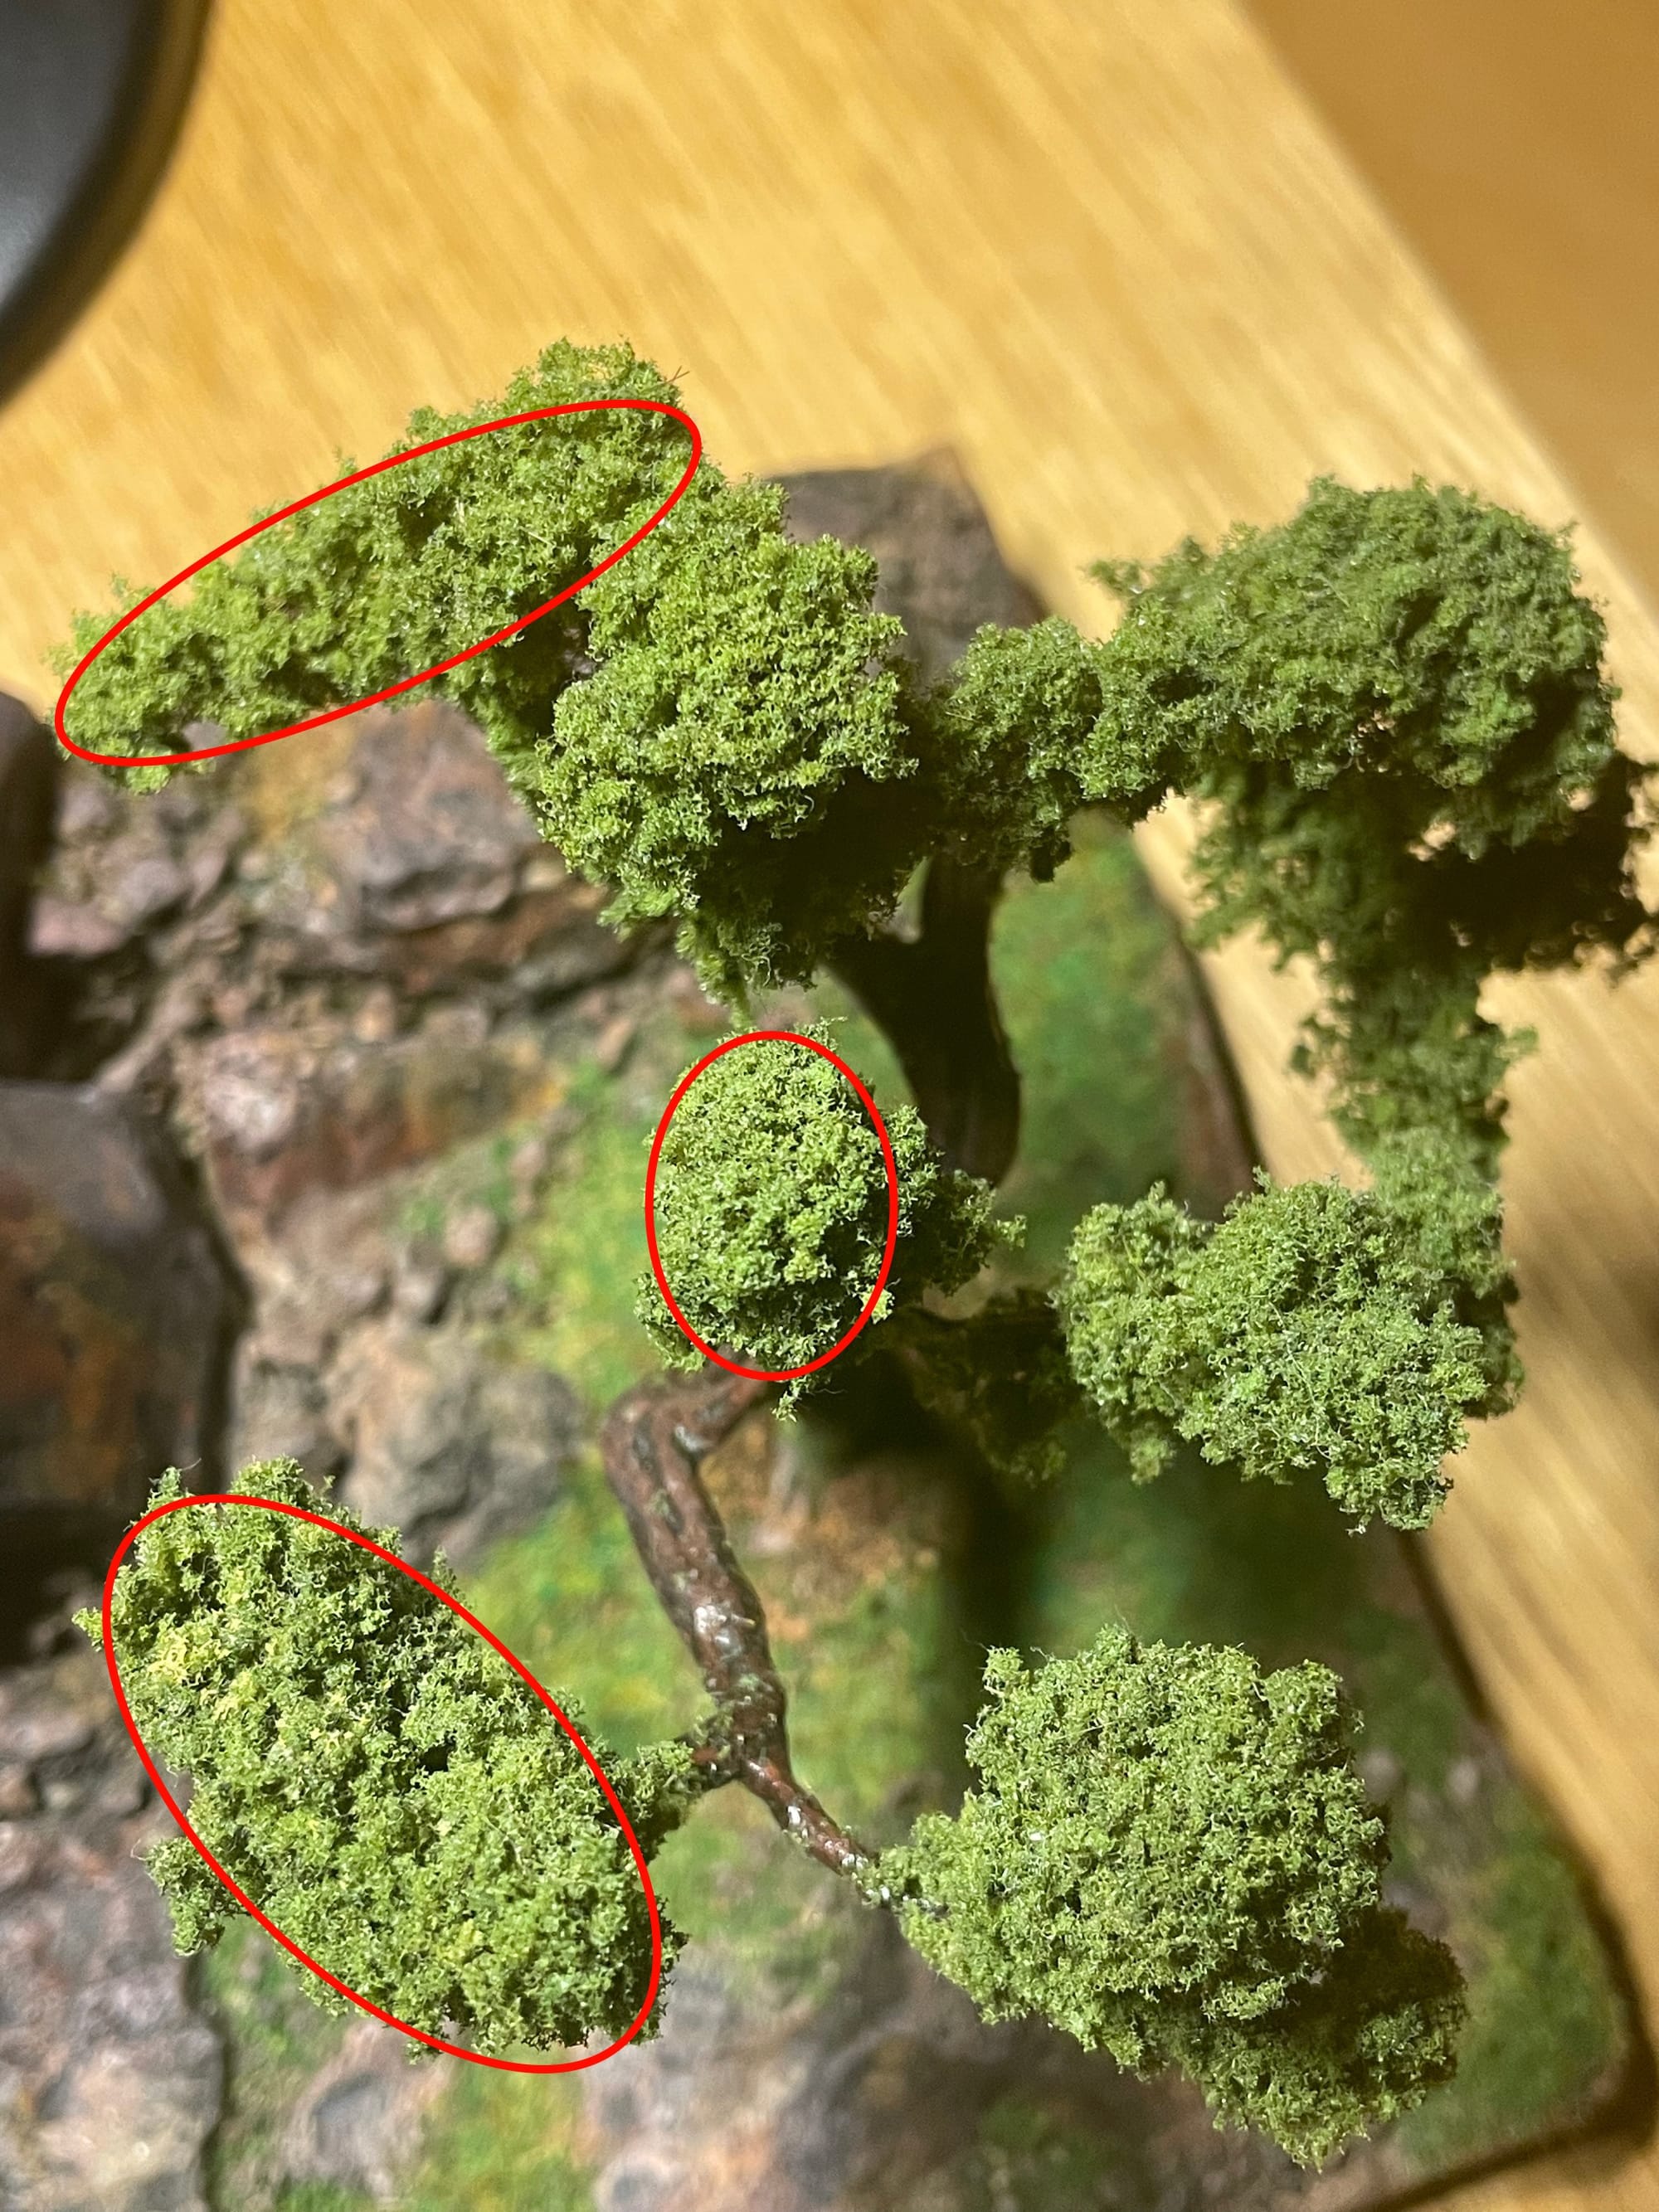
Even if layers of flock add up to create some volume, it’s essential that the underlying branches provide structure in all directions so that it looks more realistic.
The canopy of the tree is not very dense.
I would have liked something more like a dome, which would have required more branches at the top.
I felt Luke Towan’s tutorial doesn’t say it all in that respect: if you look closely, you can see that he adds individual wires to his tree in different places.
Also he’s branching much more frequently, which produces a smaller tree but with a denser branch structure.
Next time, I’ll try those additions, as well using more wires or longer ones, and branching them out more frequently.
… and other flaws
I liked using Sculpey clay but once it’s baked, you can’t change your tree’s shape.
If you must ask, yes, I did snap a branch by testing its flexibility...
Luke Towan uses liquid latex, which can preserve flexibility after it’s cured.
I might try that next time.
The spray glue I used also made the branches it touched very glossy ✨
That’s not very realistic… I bought some Noch Spray and Fix adhesive (61152) for next time as it’s supposed to be made for flock, and matte.
Landscape modelling
My first step was to decide what environment I wanted my tree to be in.
I knew I wanted rocks—a mountain-like formation—and grass.
Static grass always looks so cool!
What helped me to decide how to begin was to draw a general idea of where I wanted things to be.
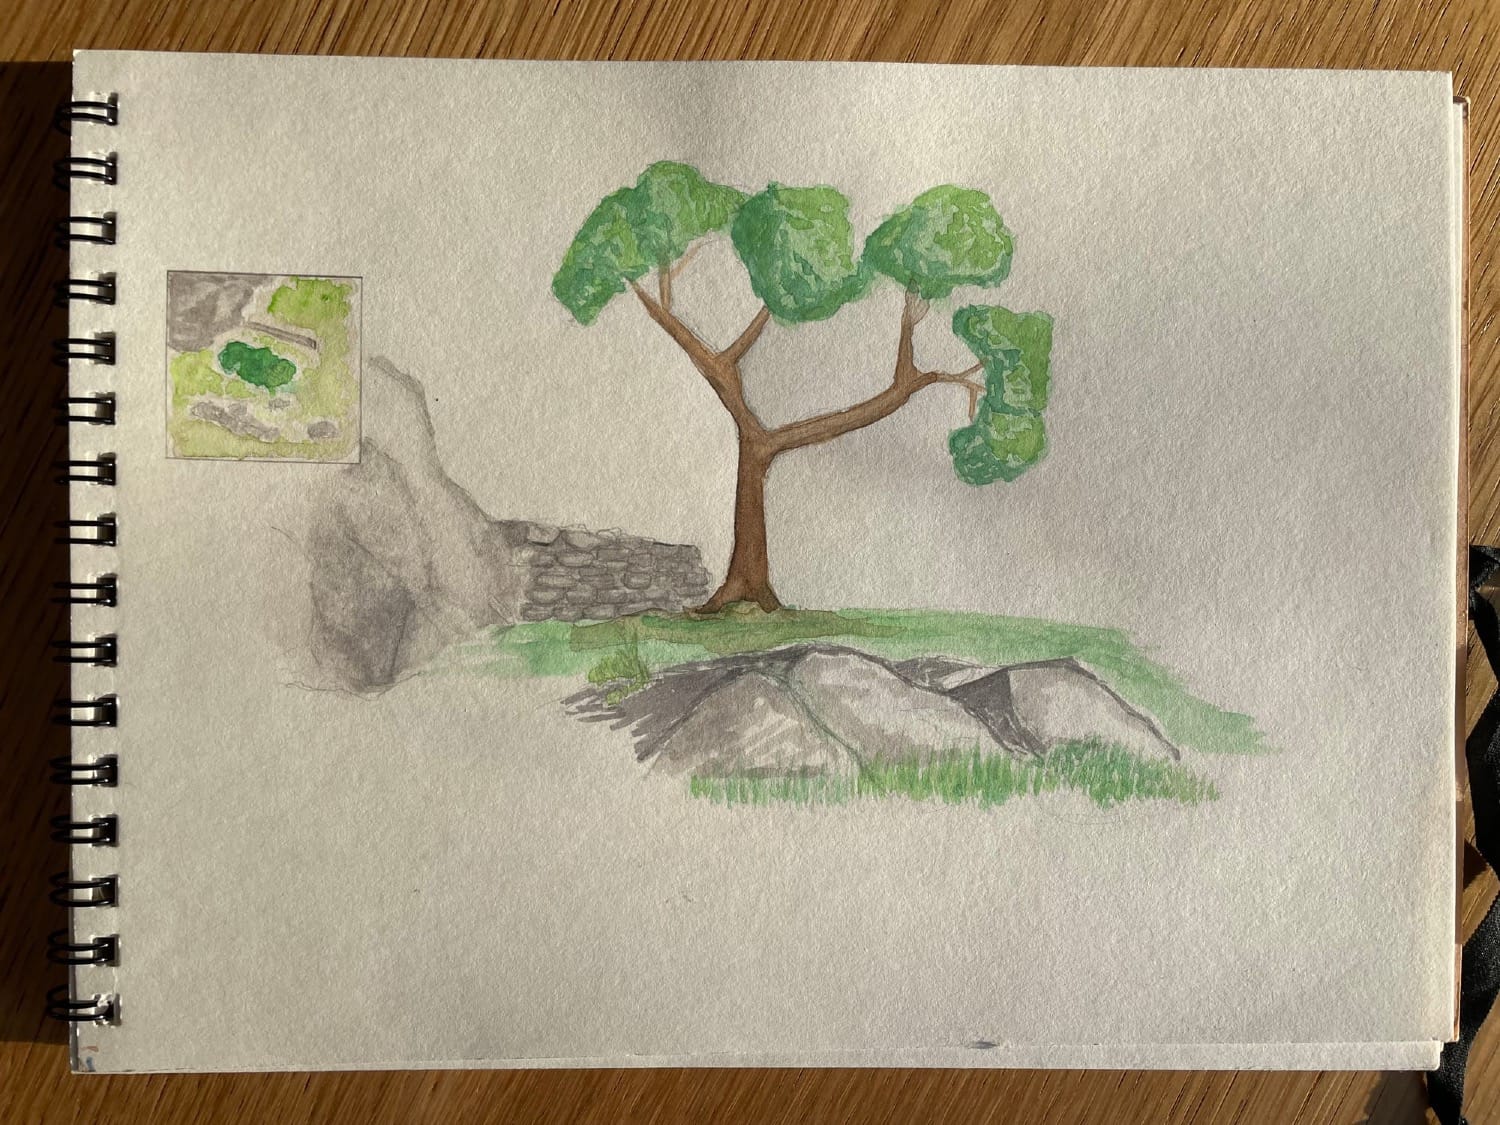
This was more of a « concept » than an actual representation of what I wanted to do. I chose to drop the idea of the stone wall after some failed attempts, and decided I had enough to learn without anyway.
The bird’s eye view « minimap » on the left was probably the most helpful to me when I started blocking out my base.
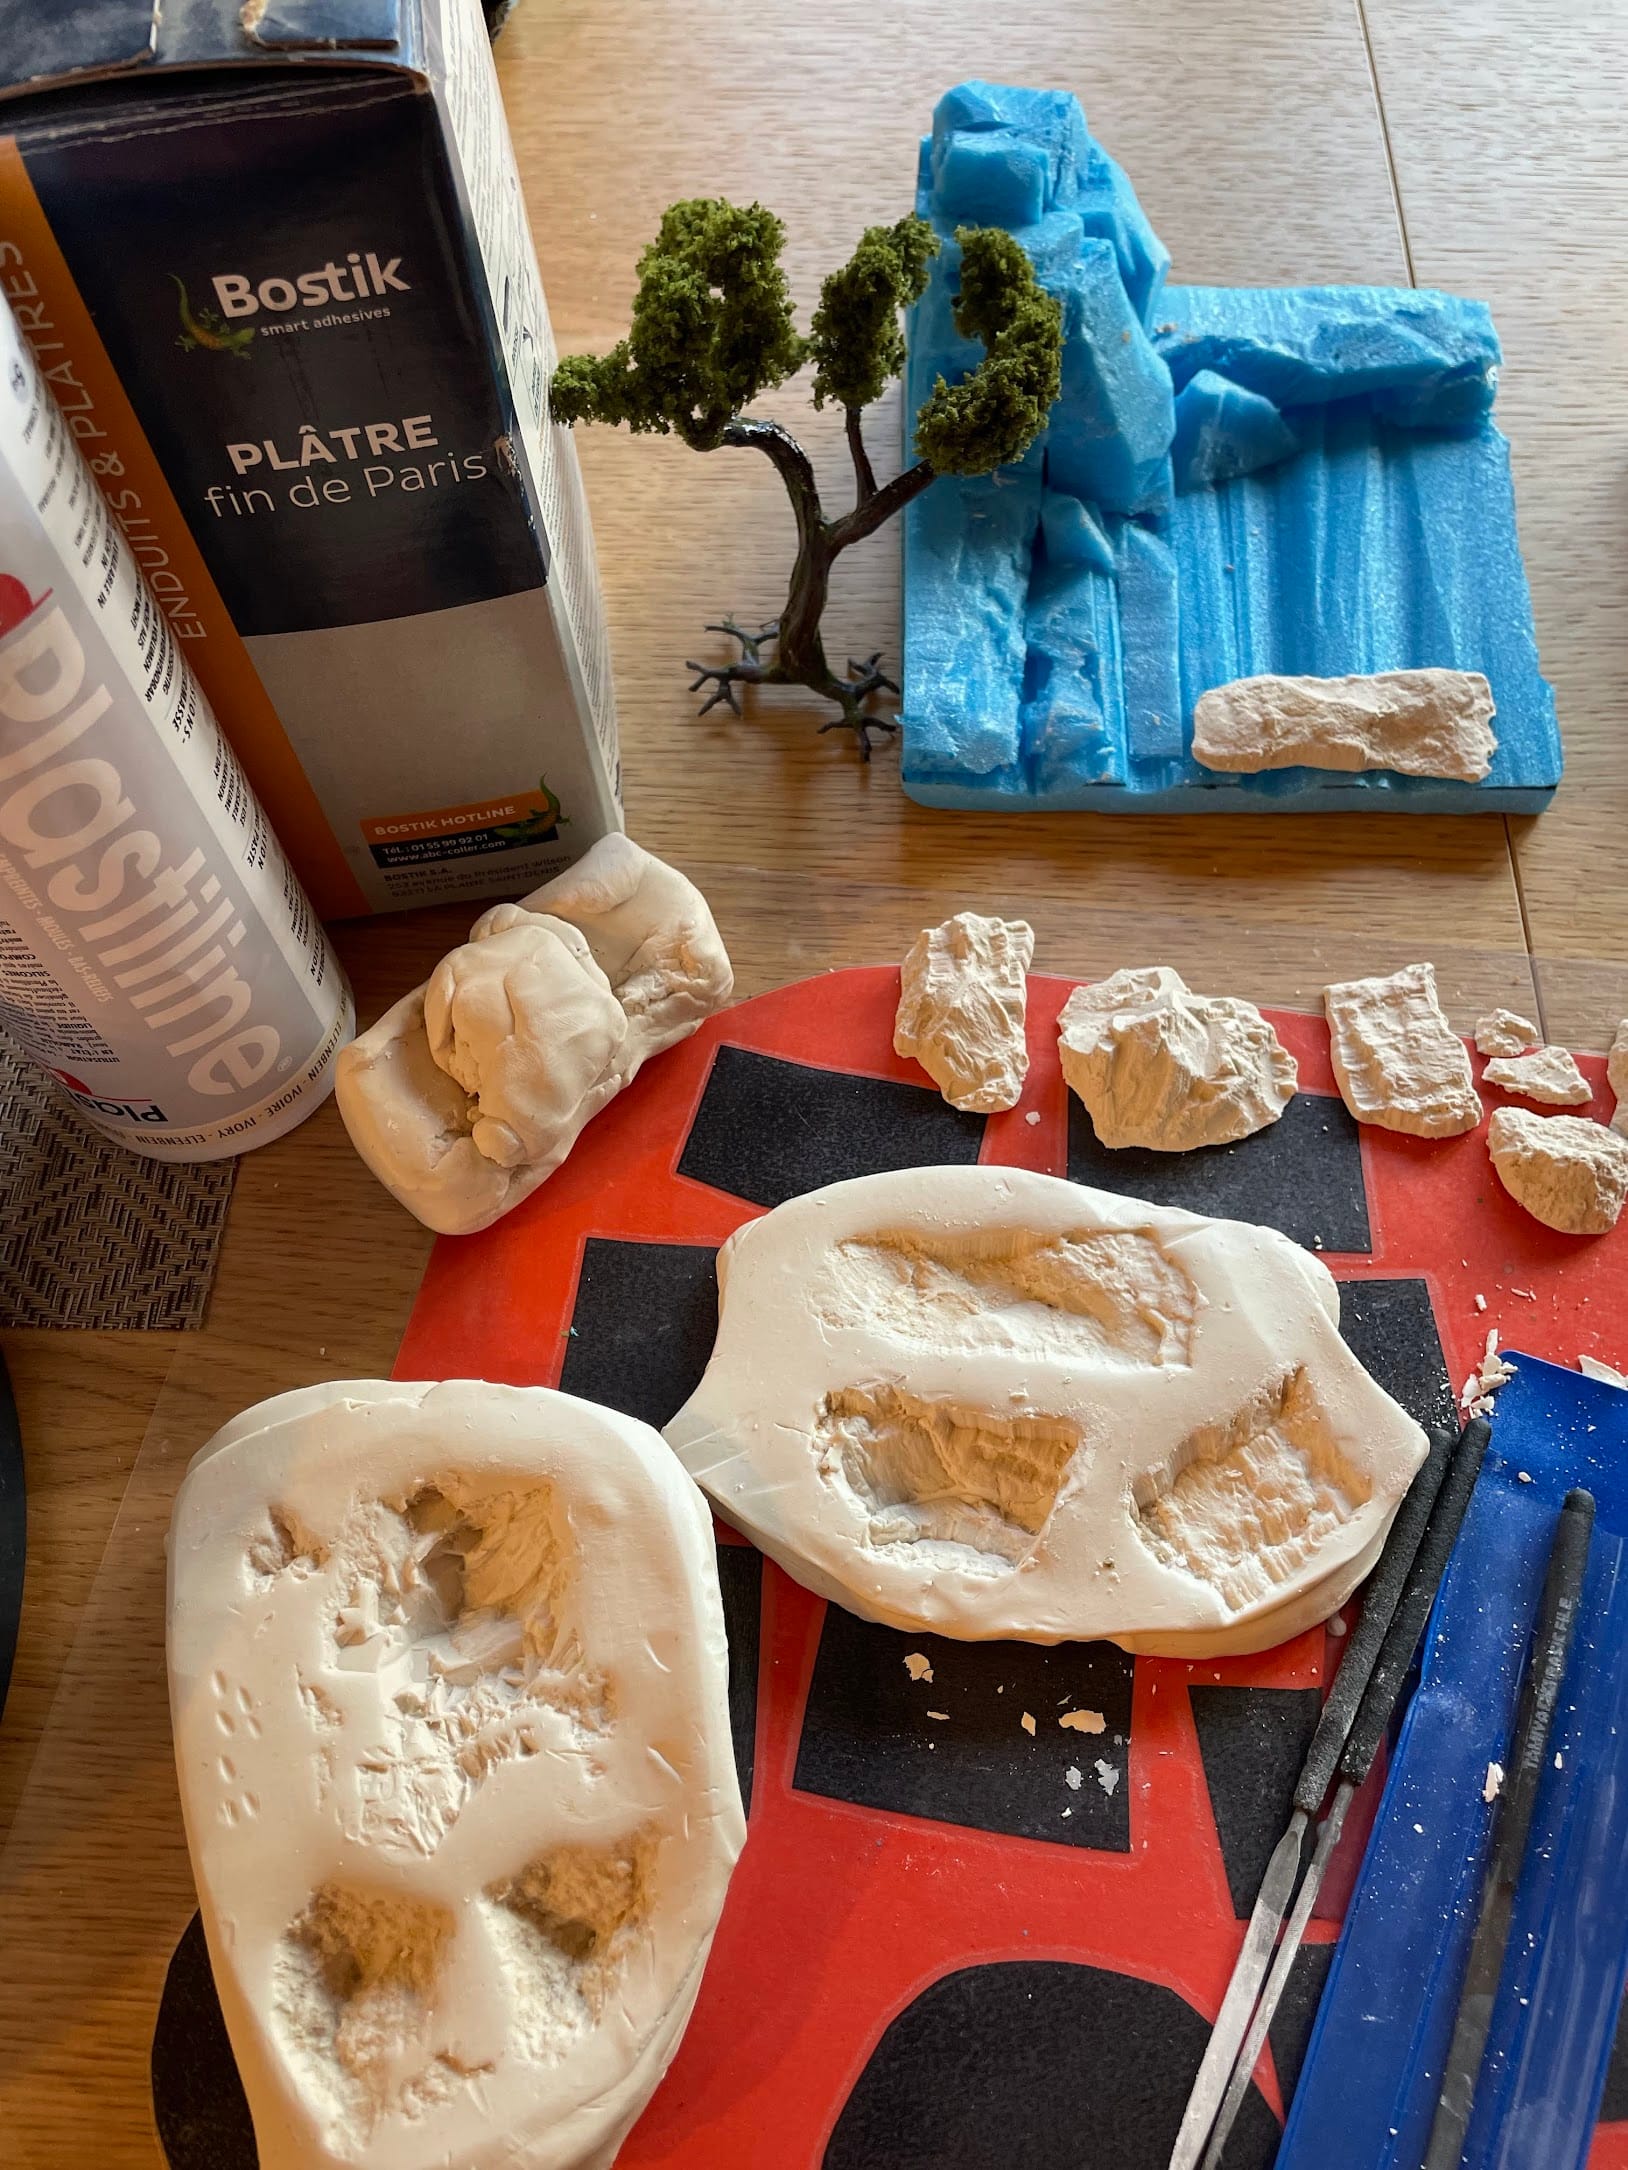
To do so, I bought dense styrofoam boards and a cheap handheld hot wire foam cutter to block things out.
I thought the hot wire would cut through the foam easily, but it’s not simple to go straight when it is so dense!
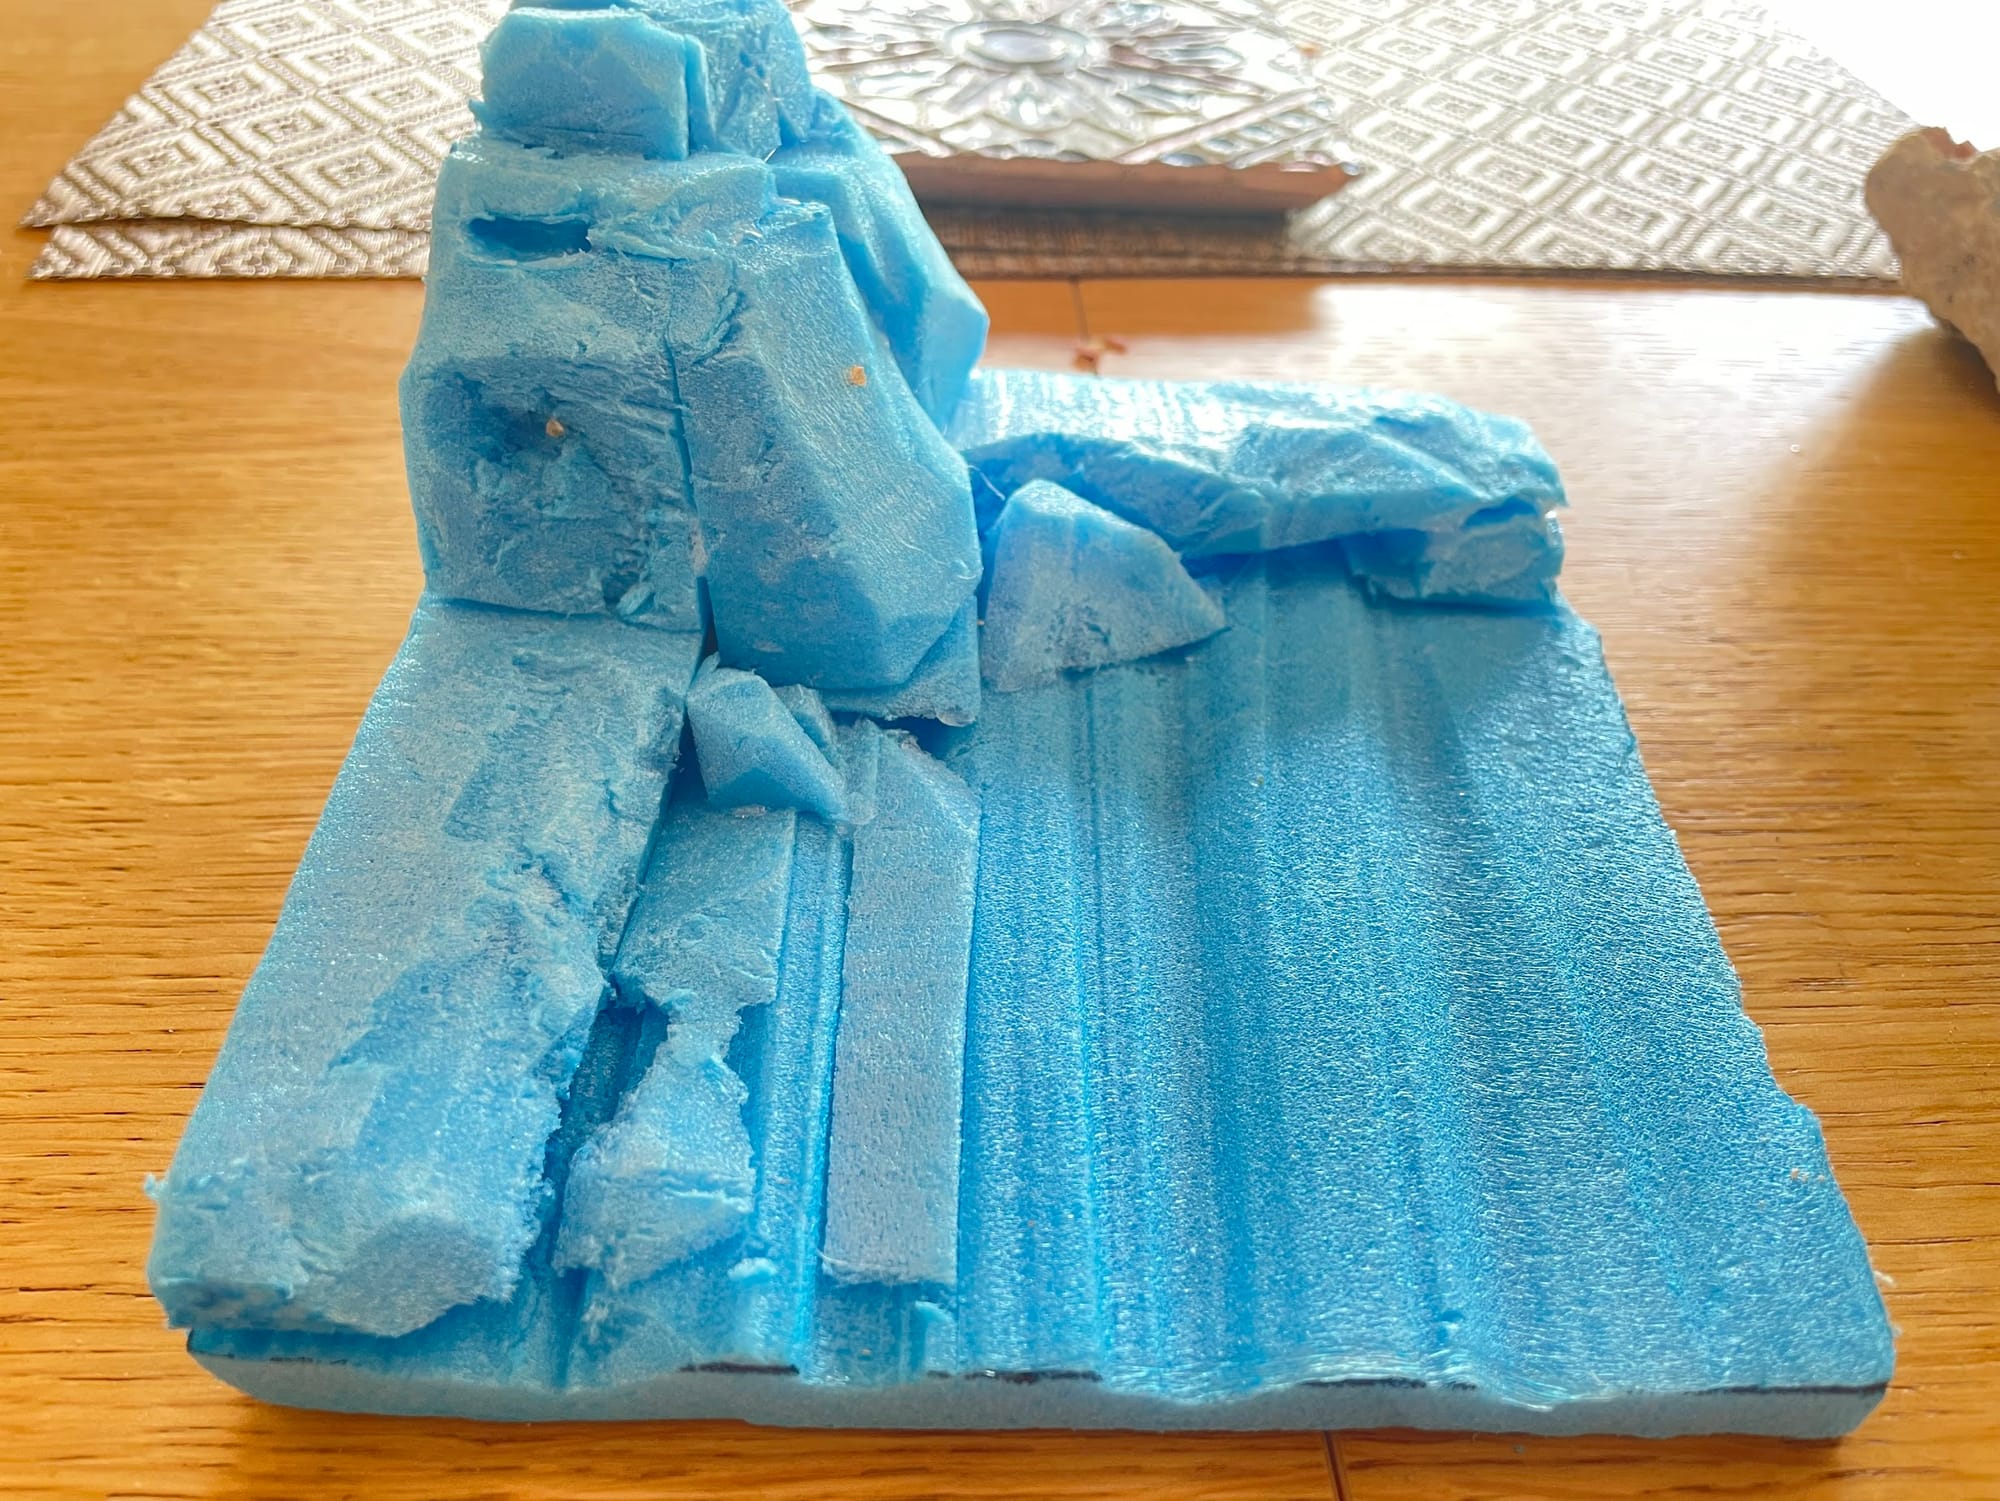
As a result, the base of my diorama didn’t look as neat as I would have wanted it…
It still worked out well once I covered everything with plaster, but the edges of the piece remained sketchy… I should have taken the time to sand them properly.

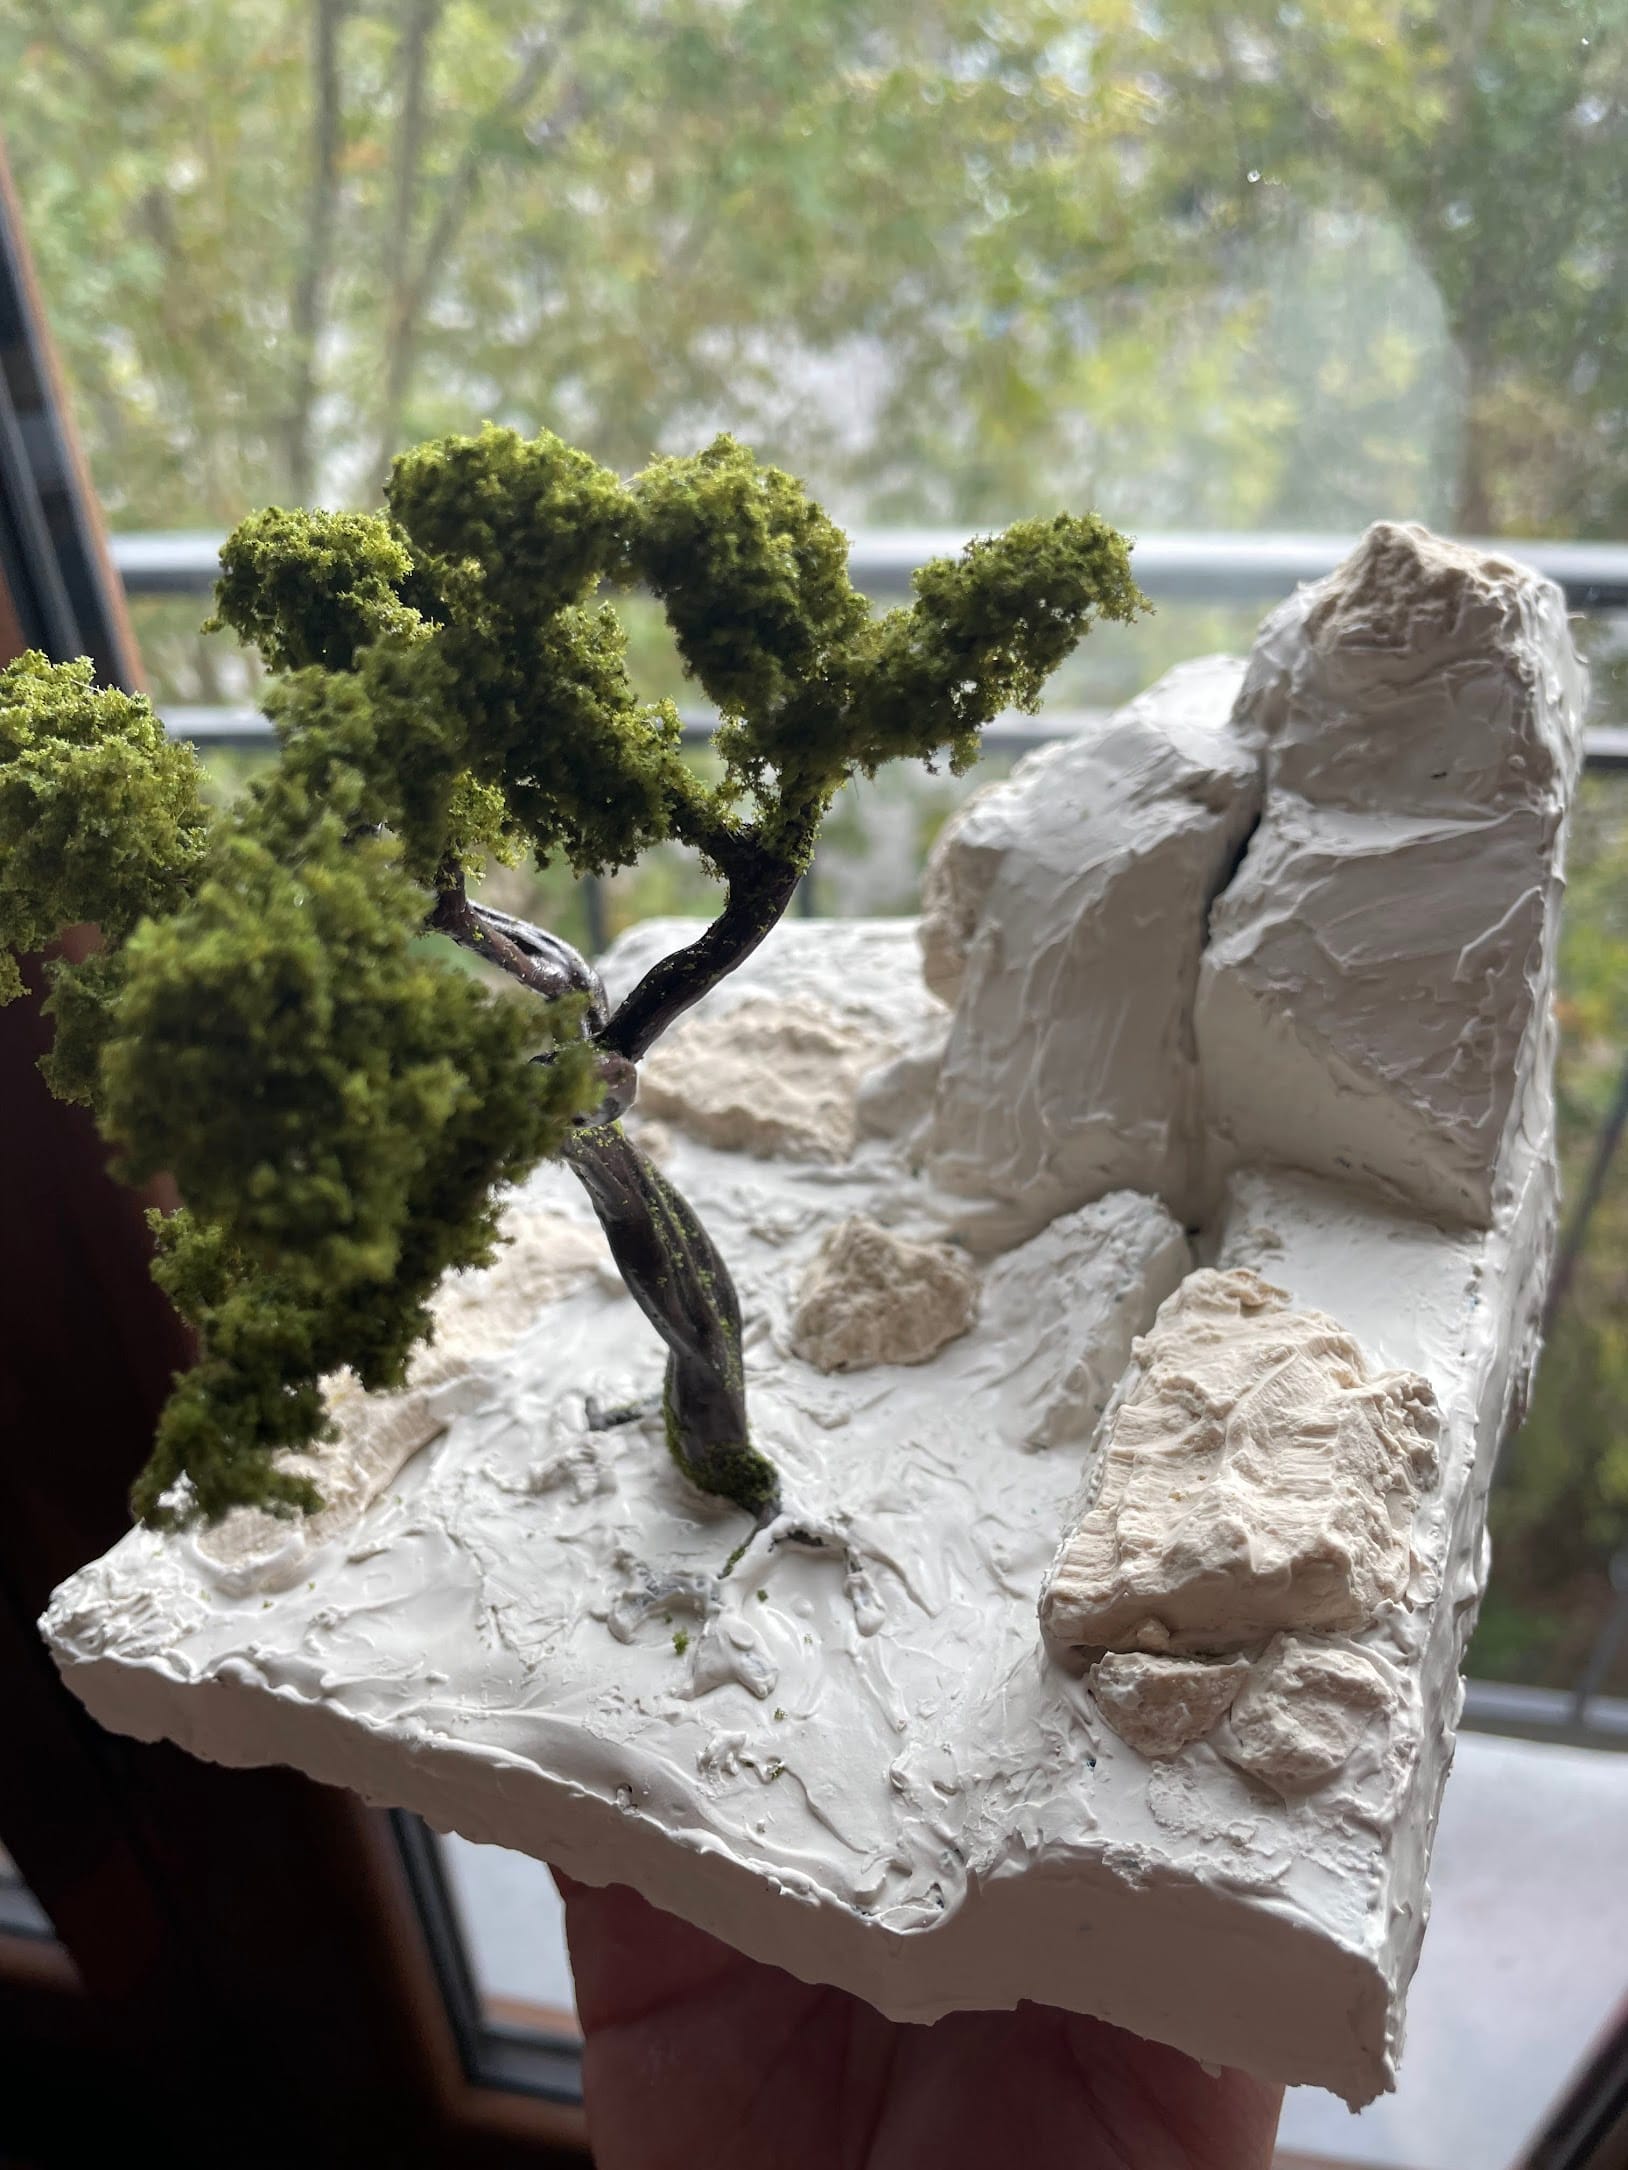
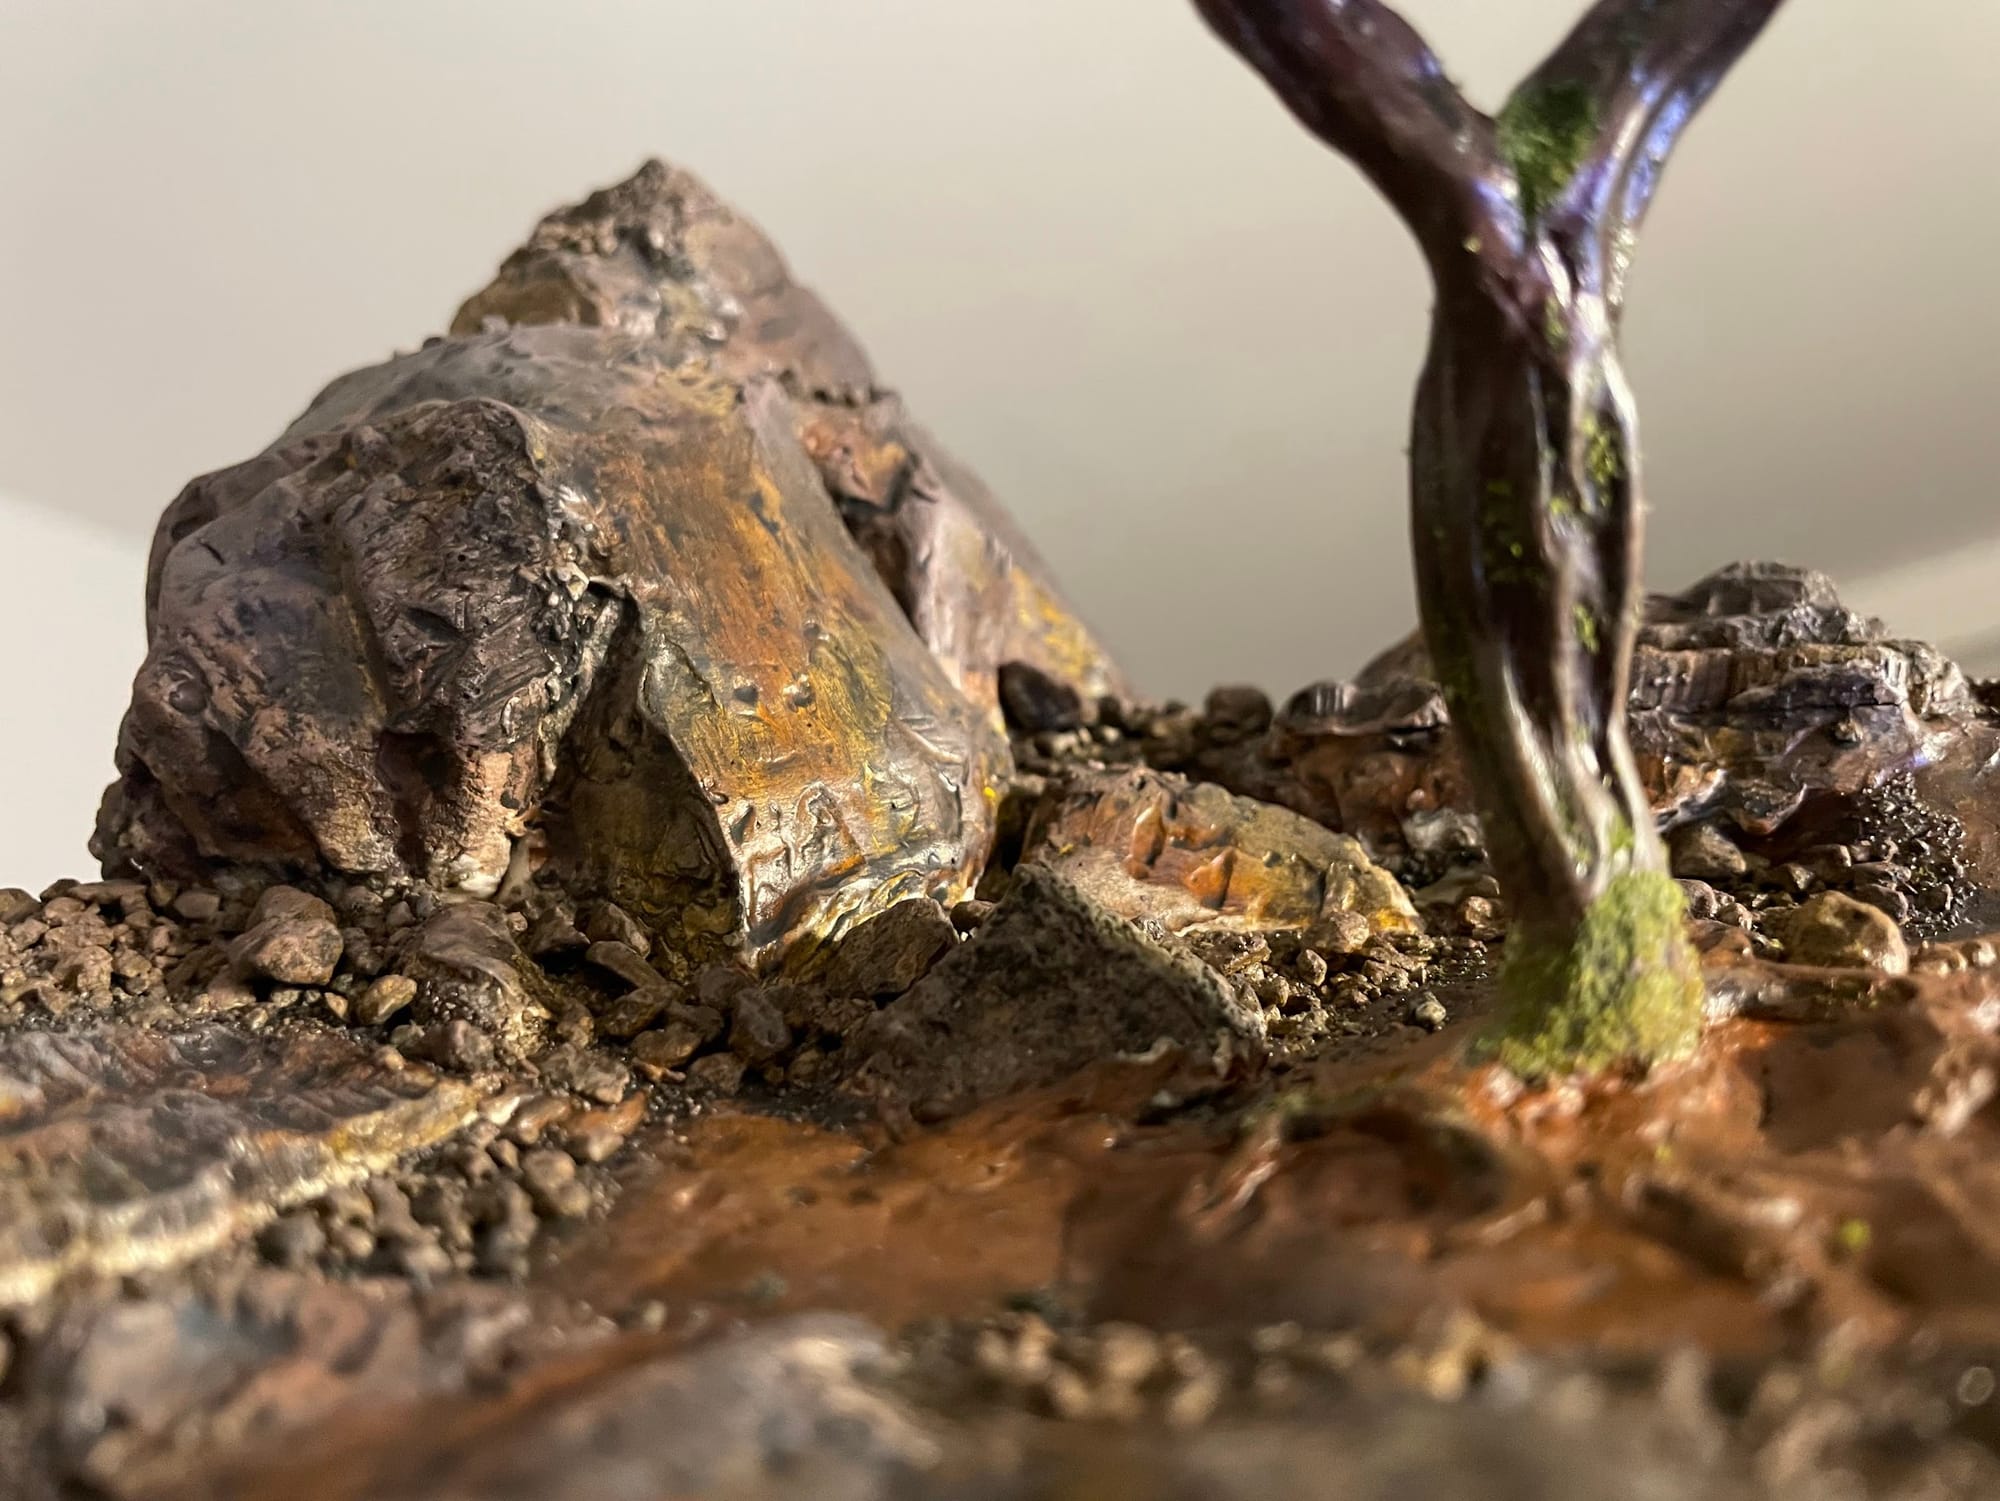
I chose to place the tree in the plaster directly… we’ll get back to this.
Speaking of plaster, mine was too liquid.
I think I've been a bit lost in translation and bought finishing plaster (smoother & more liquid) instead of plaster filler.
It made it hard to control the shape of the rocks I was modelling, and I ended up with many « wavy » shapes that I had to smooth out by sanding them after drying. Next time, I think I’ll try to mix my own Plaster of Paris to control better its consistency and my ability to sculpt it to the desired shape.
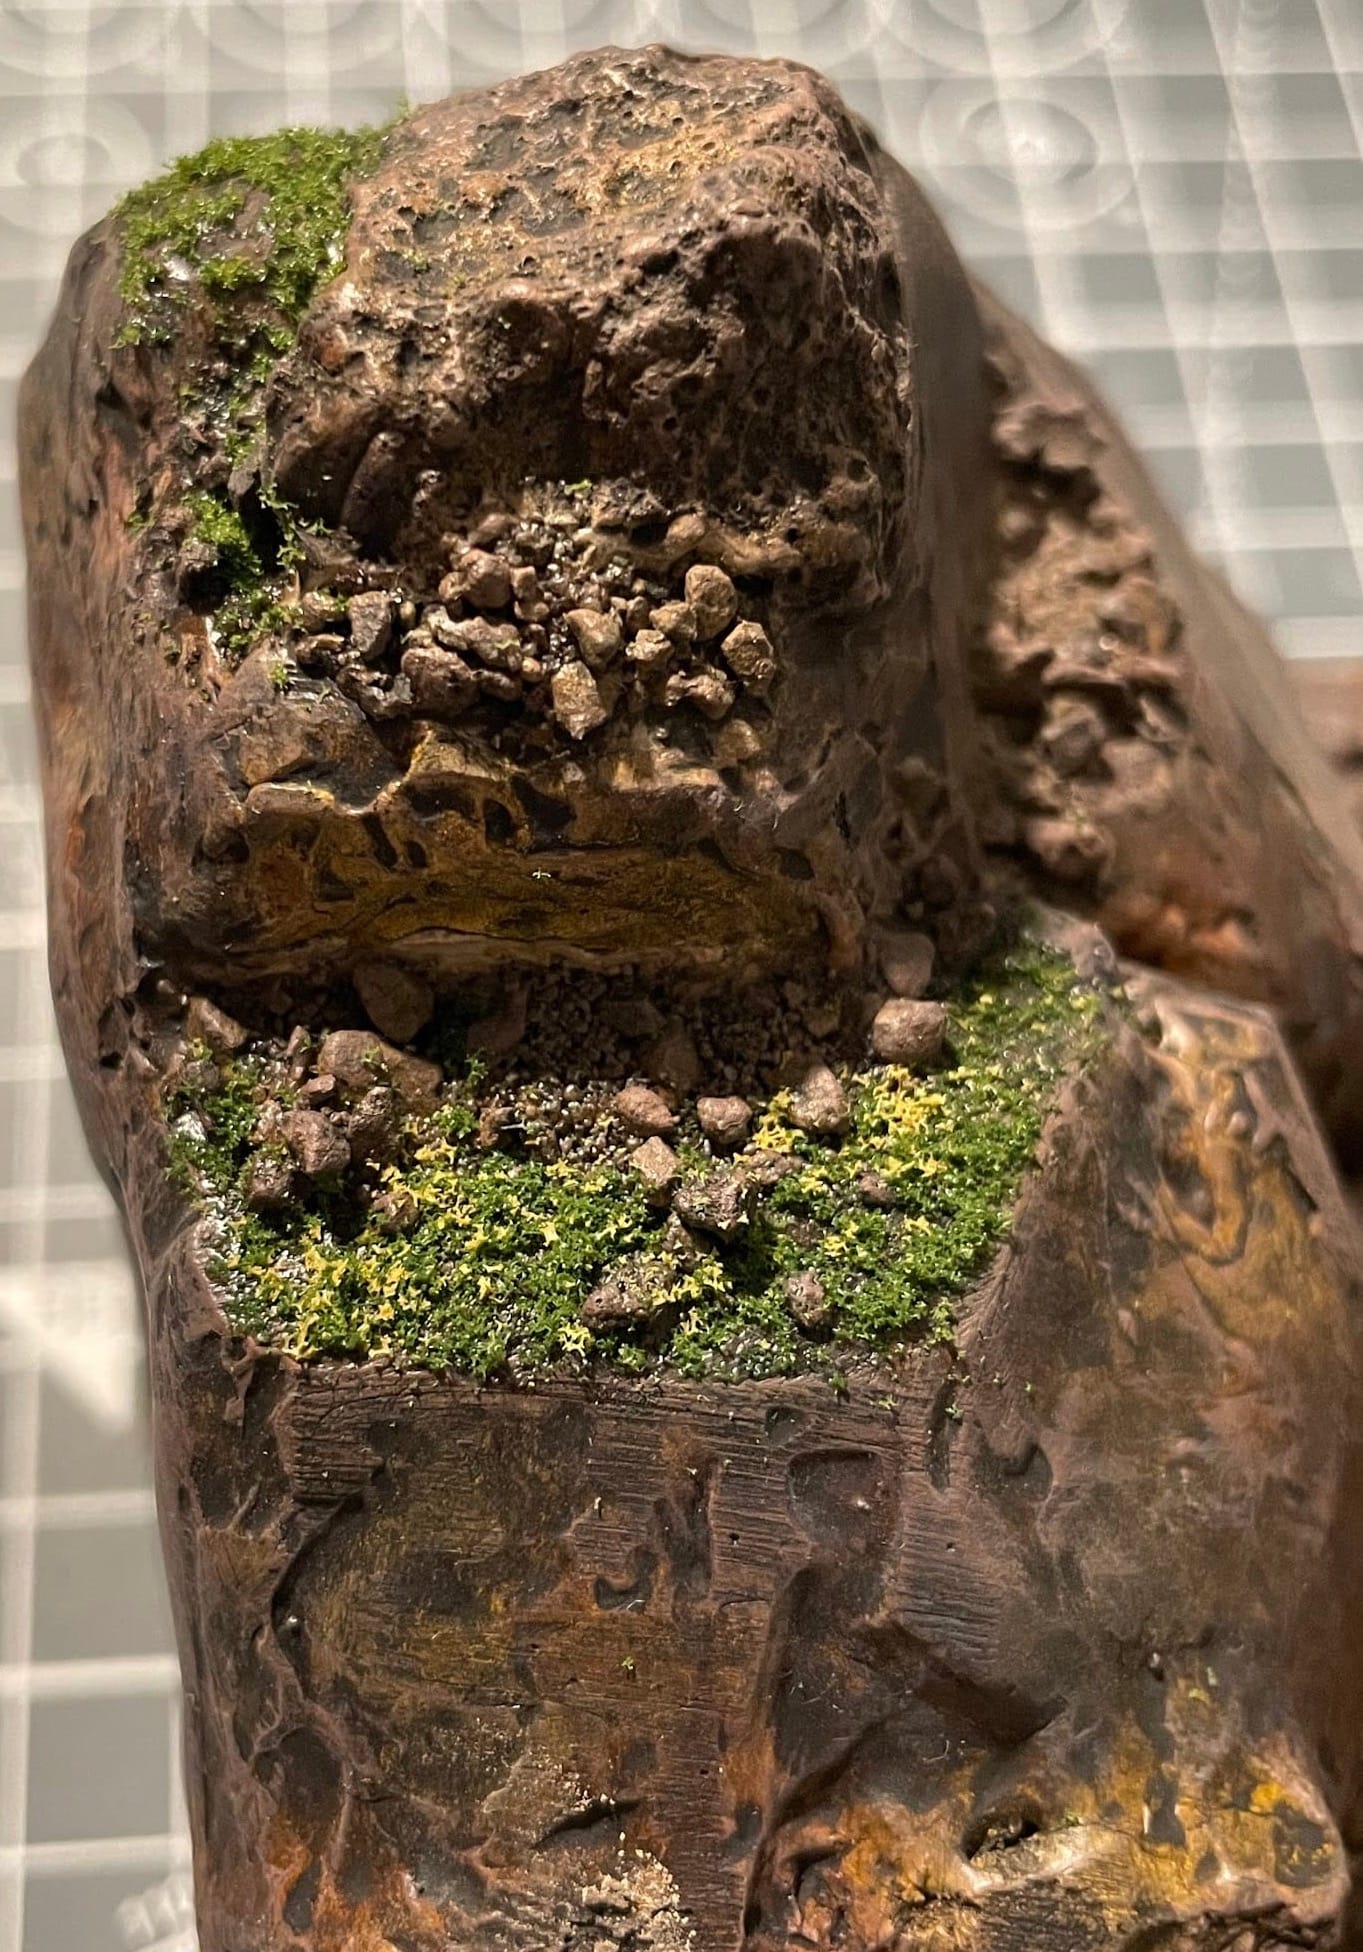
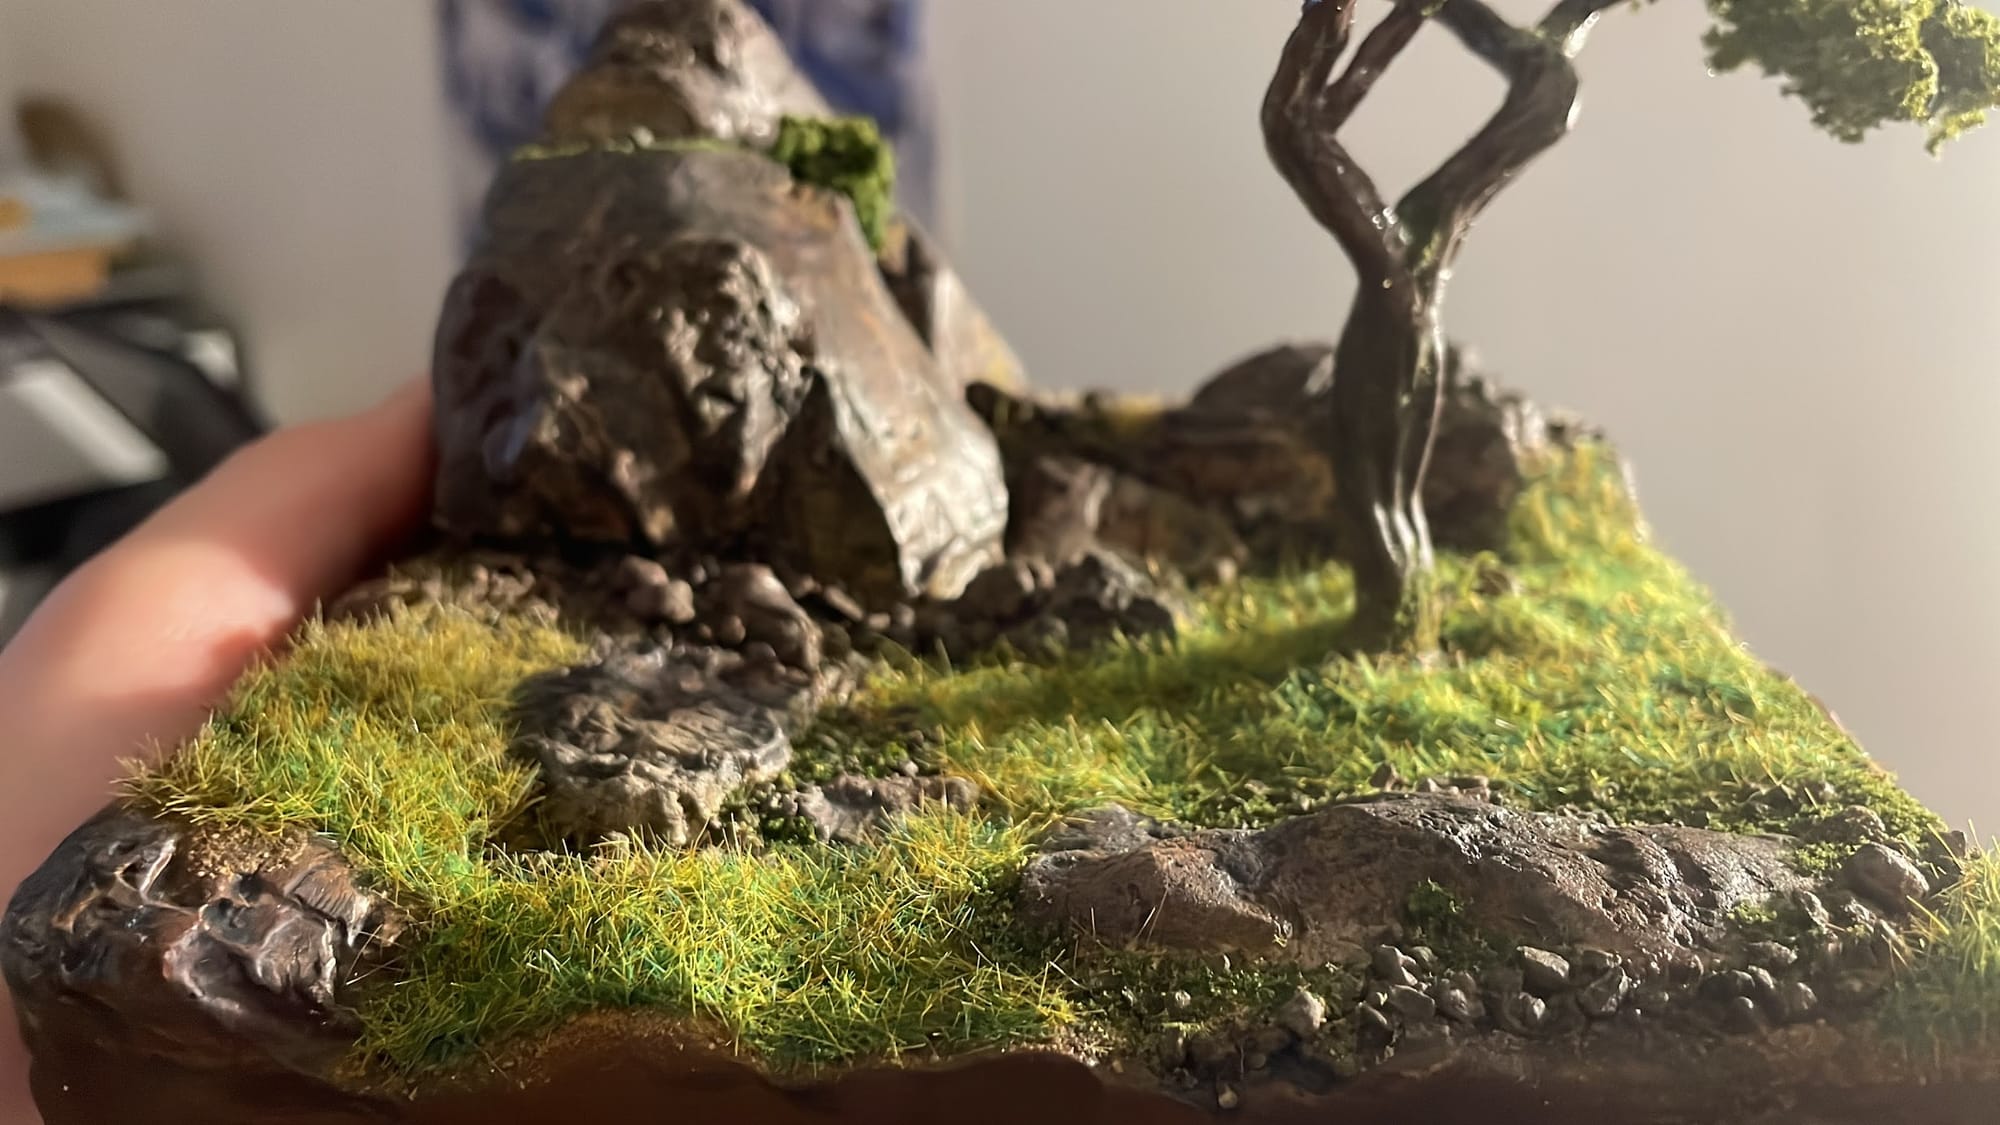
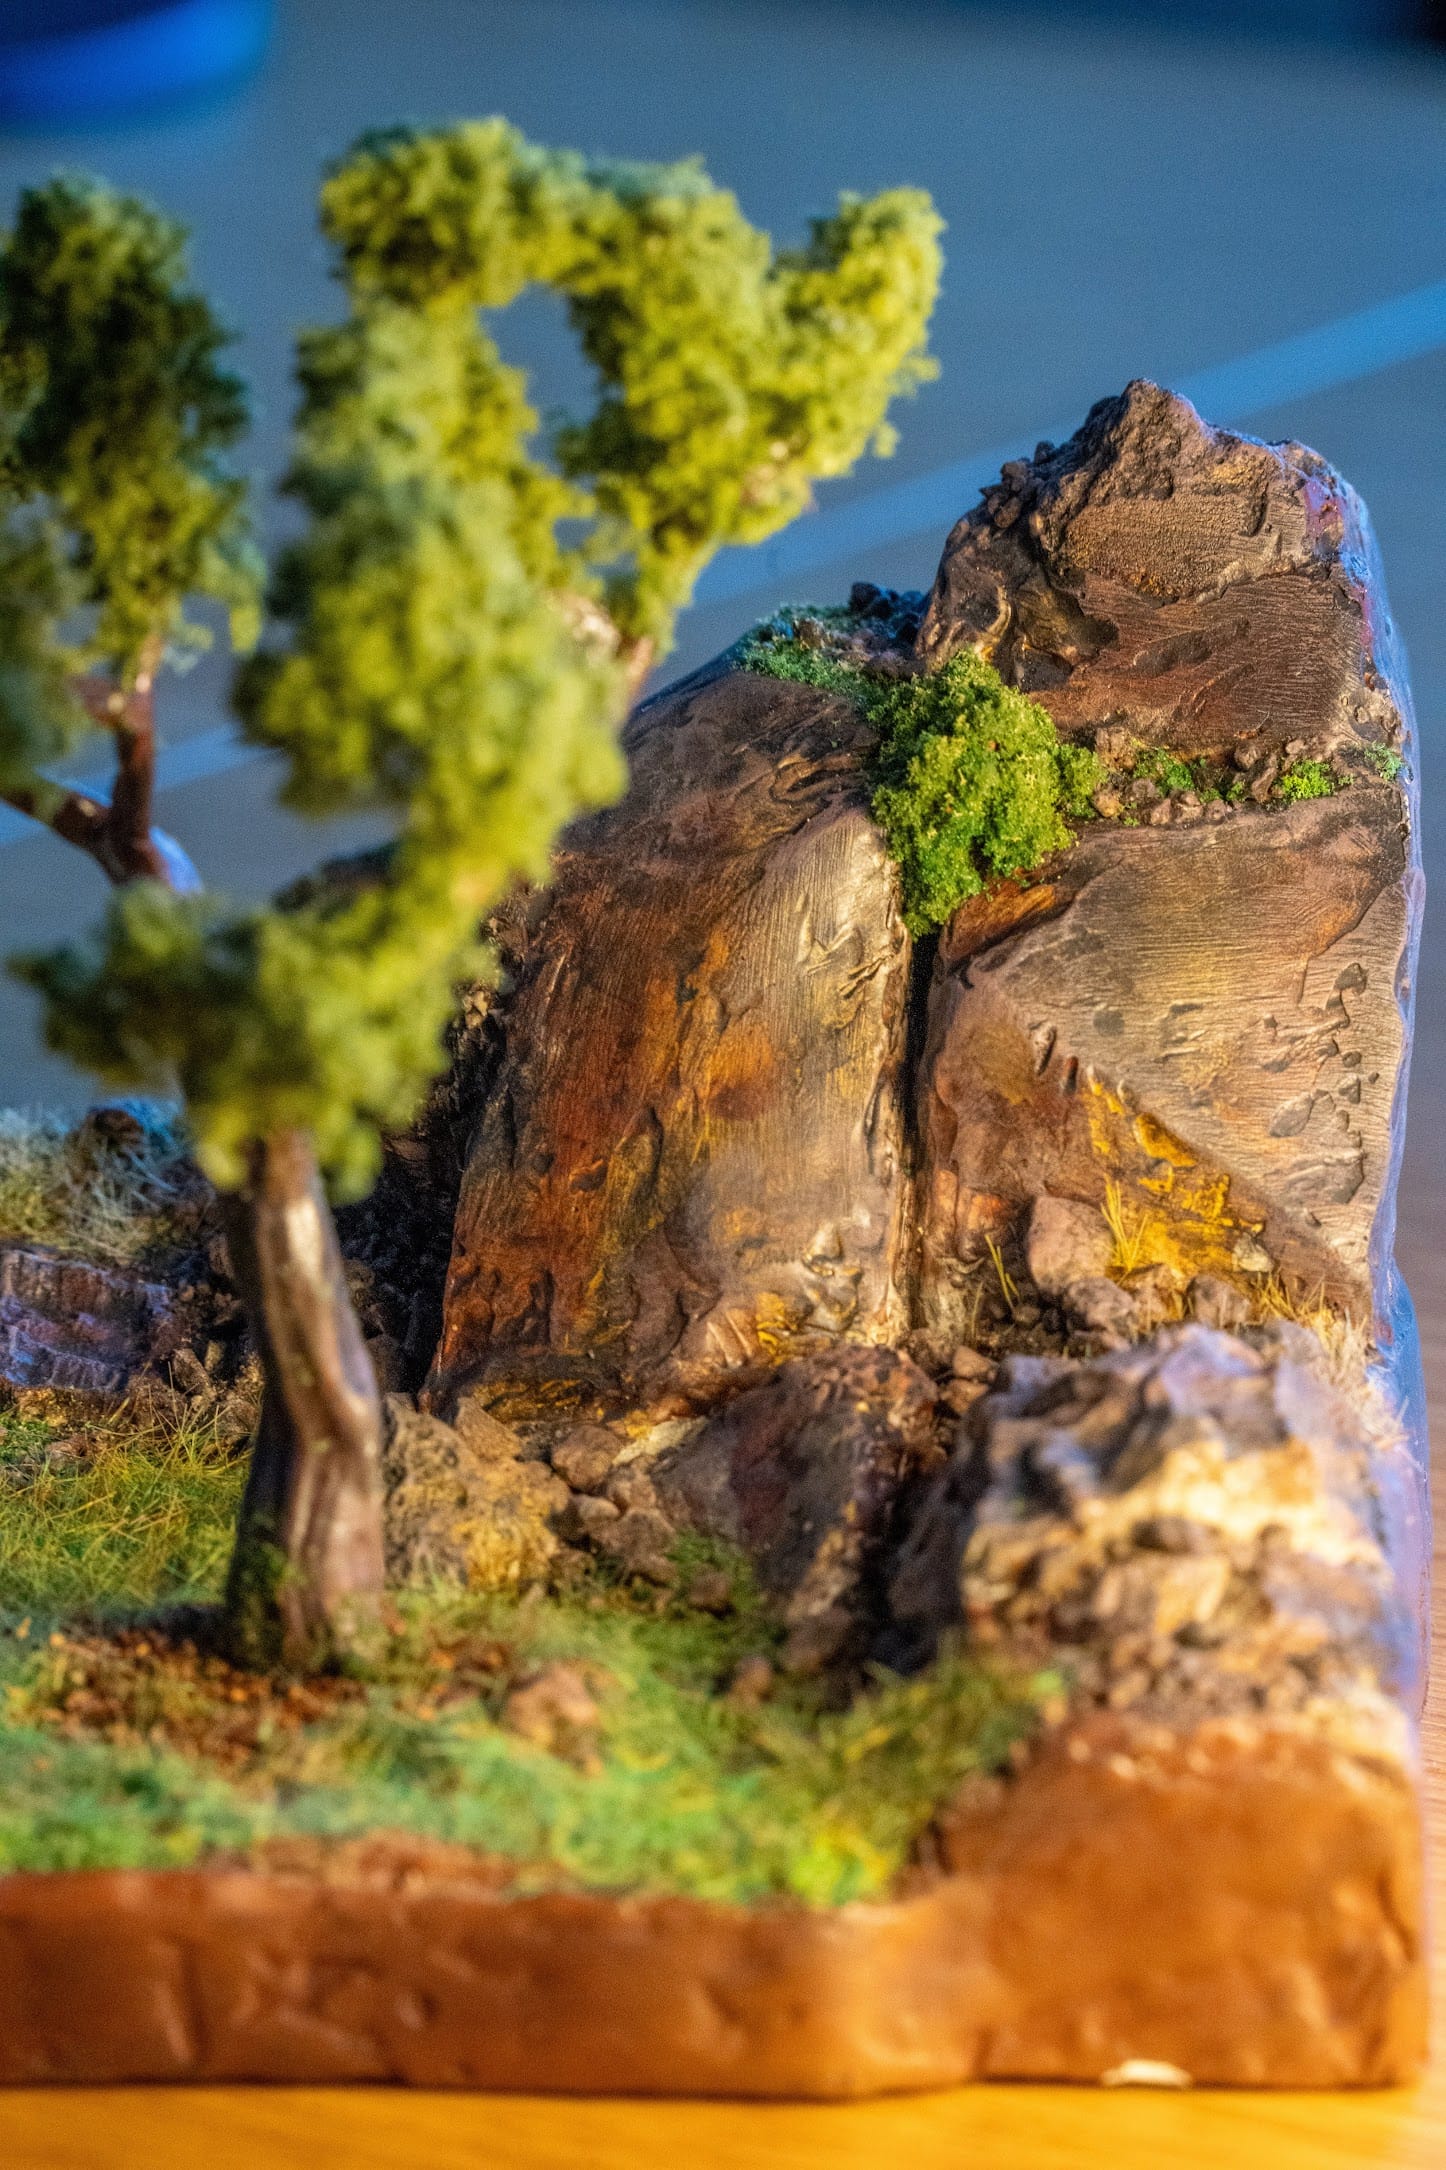
A real win for me was to use real rocks for a more realistic look in a few places. I found the technique in a tutorial from Geordie Crafts; it goes like this:
- Create moulds of natural rocks by pressing them into a slab of hard Plasticine
- Pour plaster into the mould
- Integrate moulded rock faces into your base
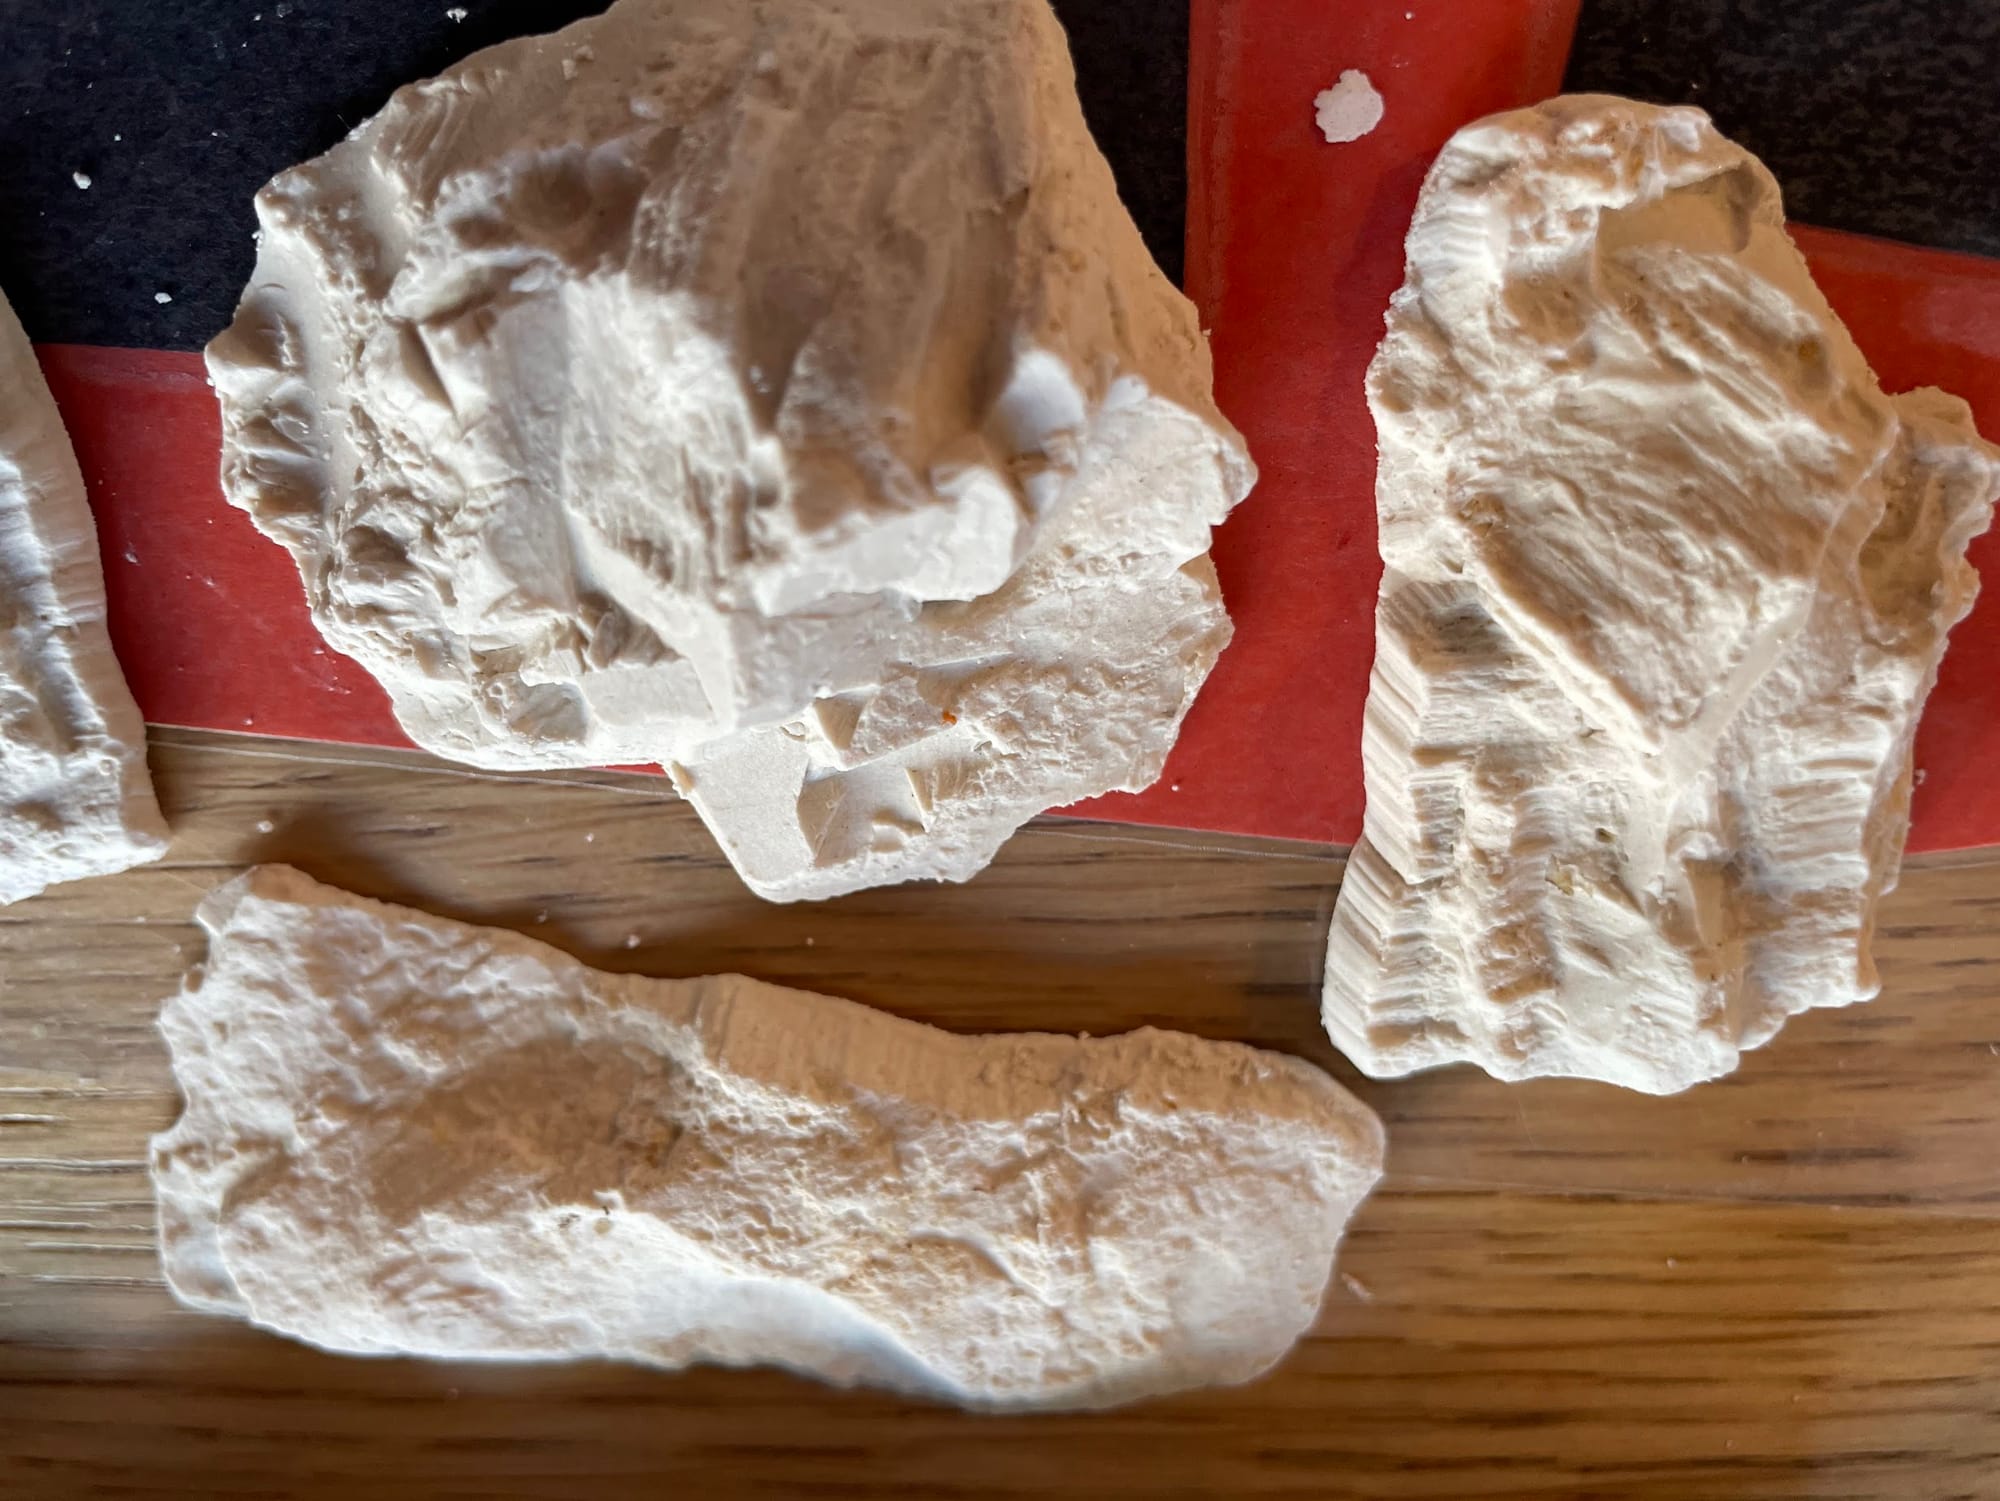
I really love how those rocks made the whole thing look more realistic.
Painting the rocks
There are a lot of different techniques to paint rocks in more or less realistic ways.
After watching a tutorial from Geek Gaming Scenics on the Leopard Spot painting technique, I decided to try it myself.
This is where the saying "trust the process" took most of its meaning for me!
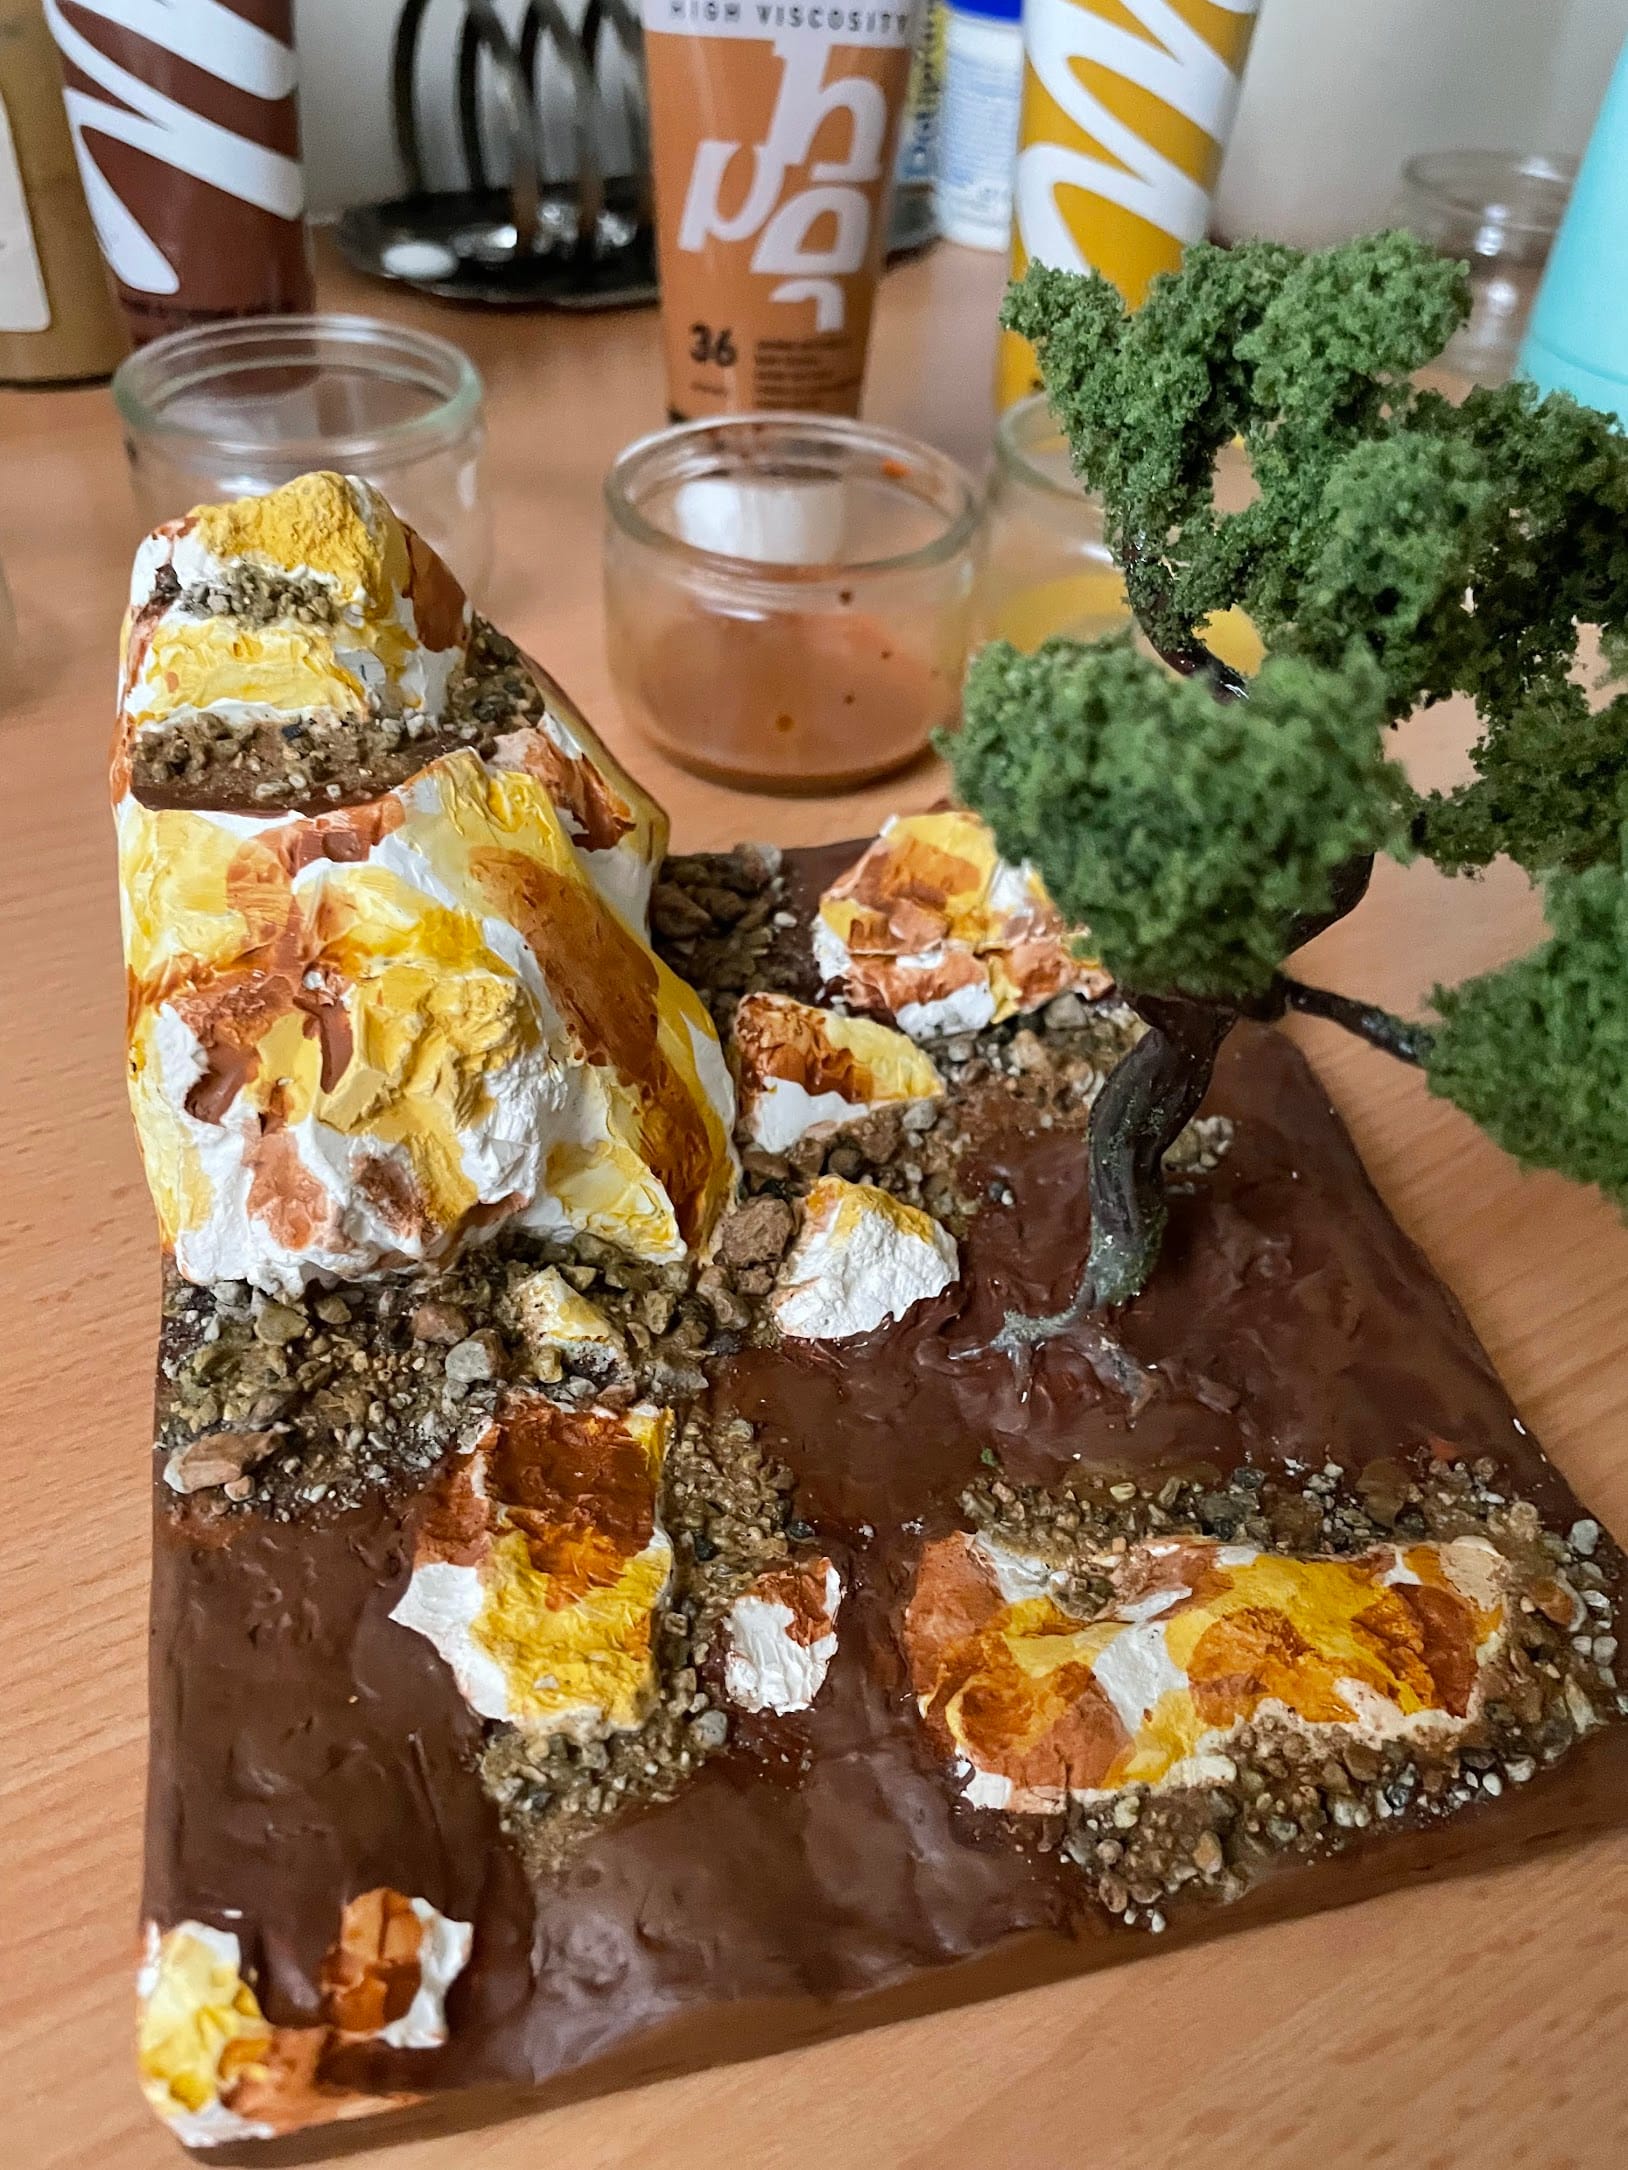
You really have to trust it when you're at that stage, and what you're aiming for is realistic-looking rocks!
Unfortunately for me, it was after that stage that things didn't go as planned: as I applied my black wash to blend everything together, I found that it would slip off the surface and not penetrate the plaster at all.
I ended kinda dry-brushing black on the rock faces to make it work, ending up with much darker rocks than what I was looking for.
I've got a few theories about the reasons that caused this:
- Luke from Geek Gaming Scenics recommends sealing the leopard spots with watered-down PVA glue, aka "scenic cement". I did the same, but I wonder if that might have filled the pores of the plaster and prevented the wash from soaking in.
- It does work for him though, and people in the comments are positive as well – so I'm left wondering whether I used Modpodge instead of PVA glue, and if that could have been the issue
- However, I also found a great tutorial from The Terrain Tutor, who does not use scenic glue at all. So I guess it's dispensable.
- Luke used plaster filler and, as I mentioned, I got the wrong thing and used finishing filler. It's possible that its smoother texture did not allow the wash to penetrate properly.
Anyway, it took some getting used to, but I'm still happy with the final result!
Applying the static grass
Almost all diorama videos I have watched use static grass applicators.
I did not succeed in resisting the urge to buy one for that first diorama 😅
Geek Gaming Scenics has different videos on static applicators and how to use them. My favourite is this one, where he shows how to build up multiple layers of grass for realistic effects.
Before risking ruining my diorama, I made a few tests on scrap pieces of foam:
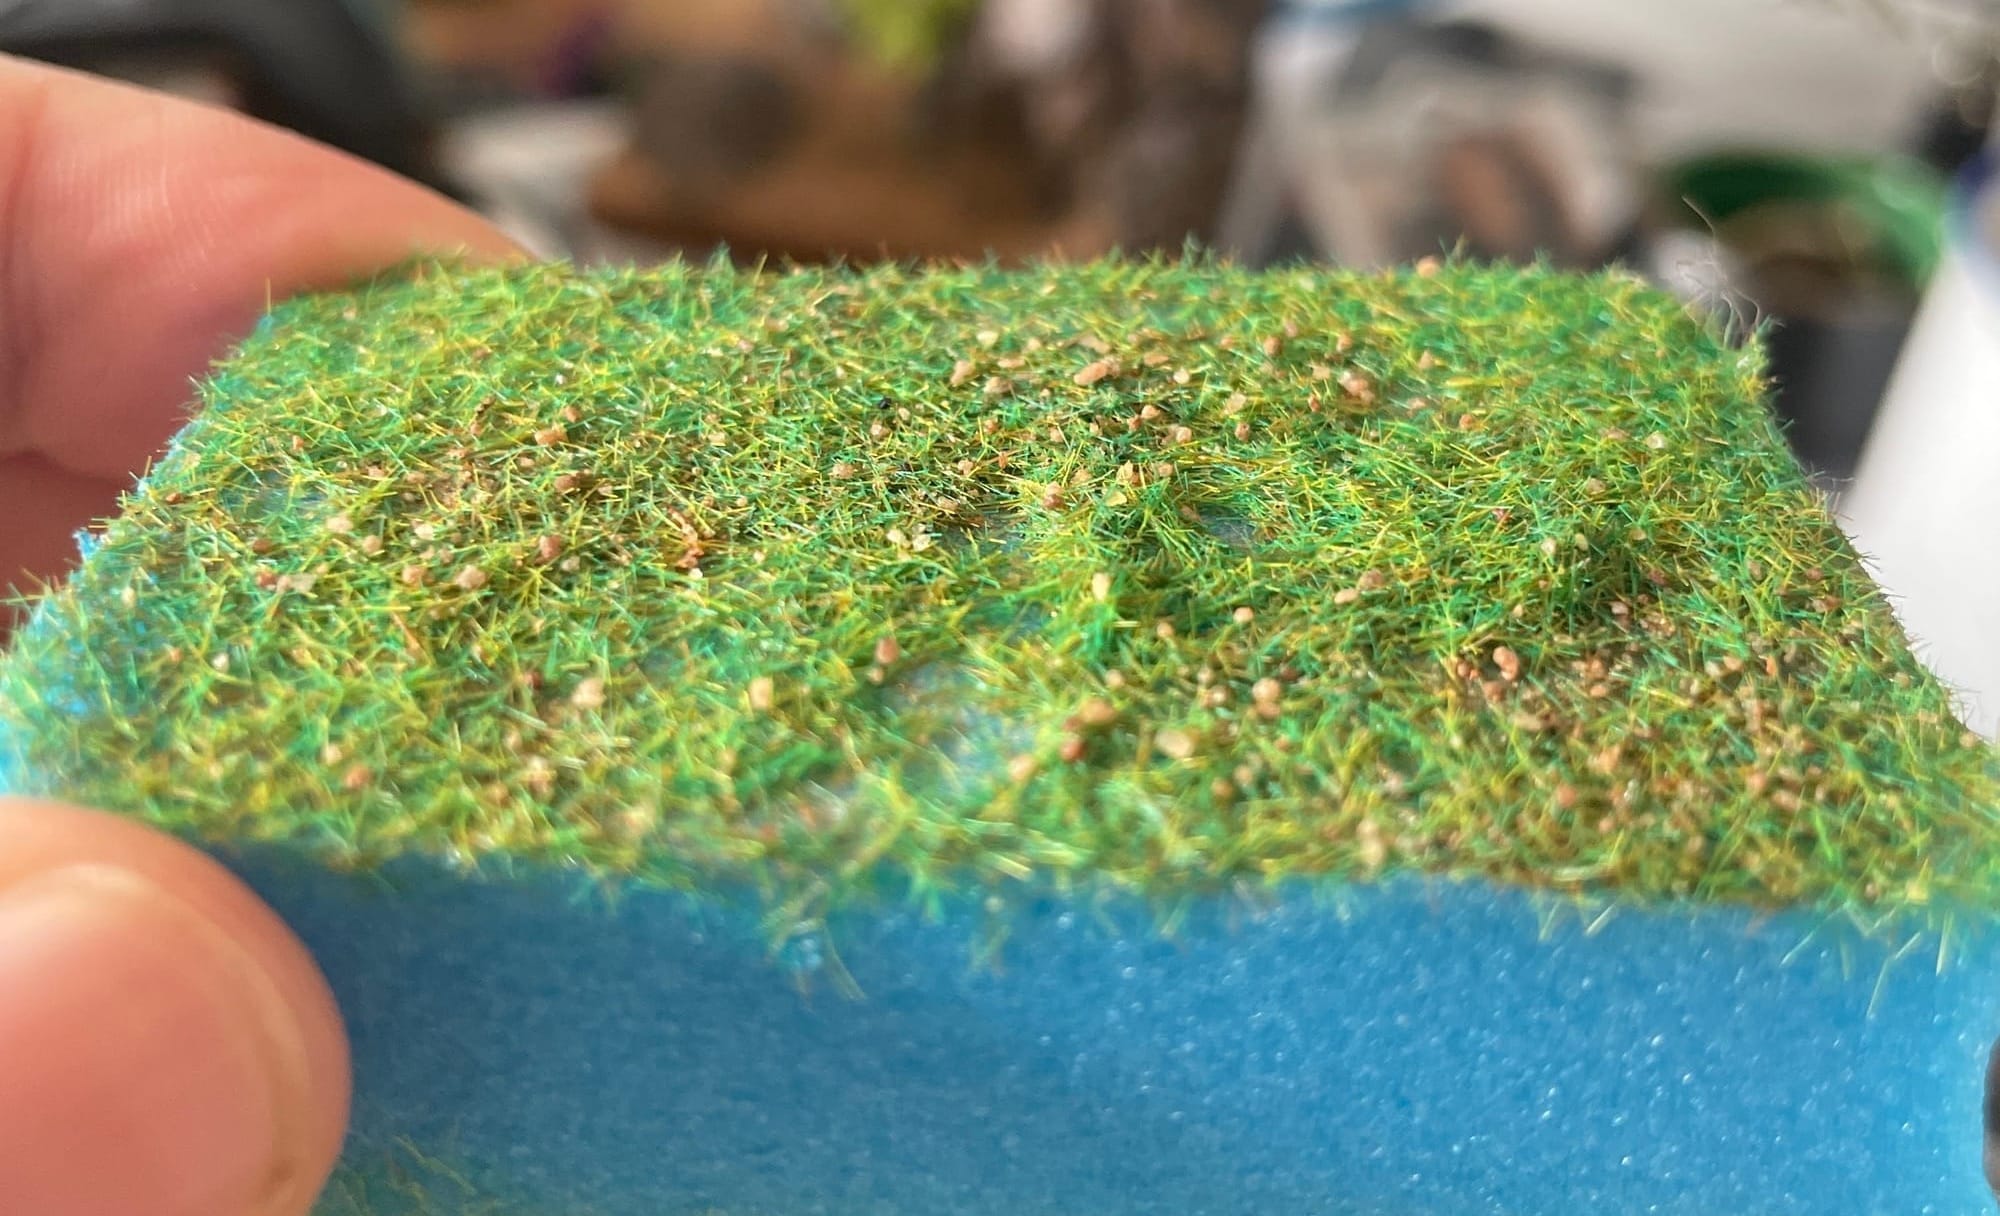
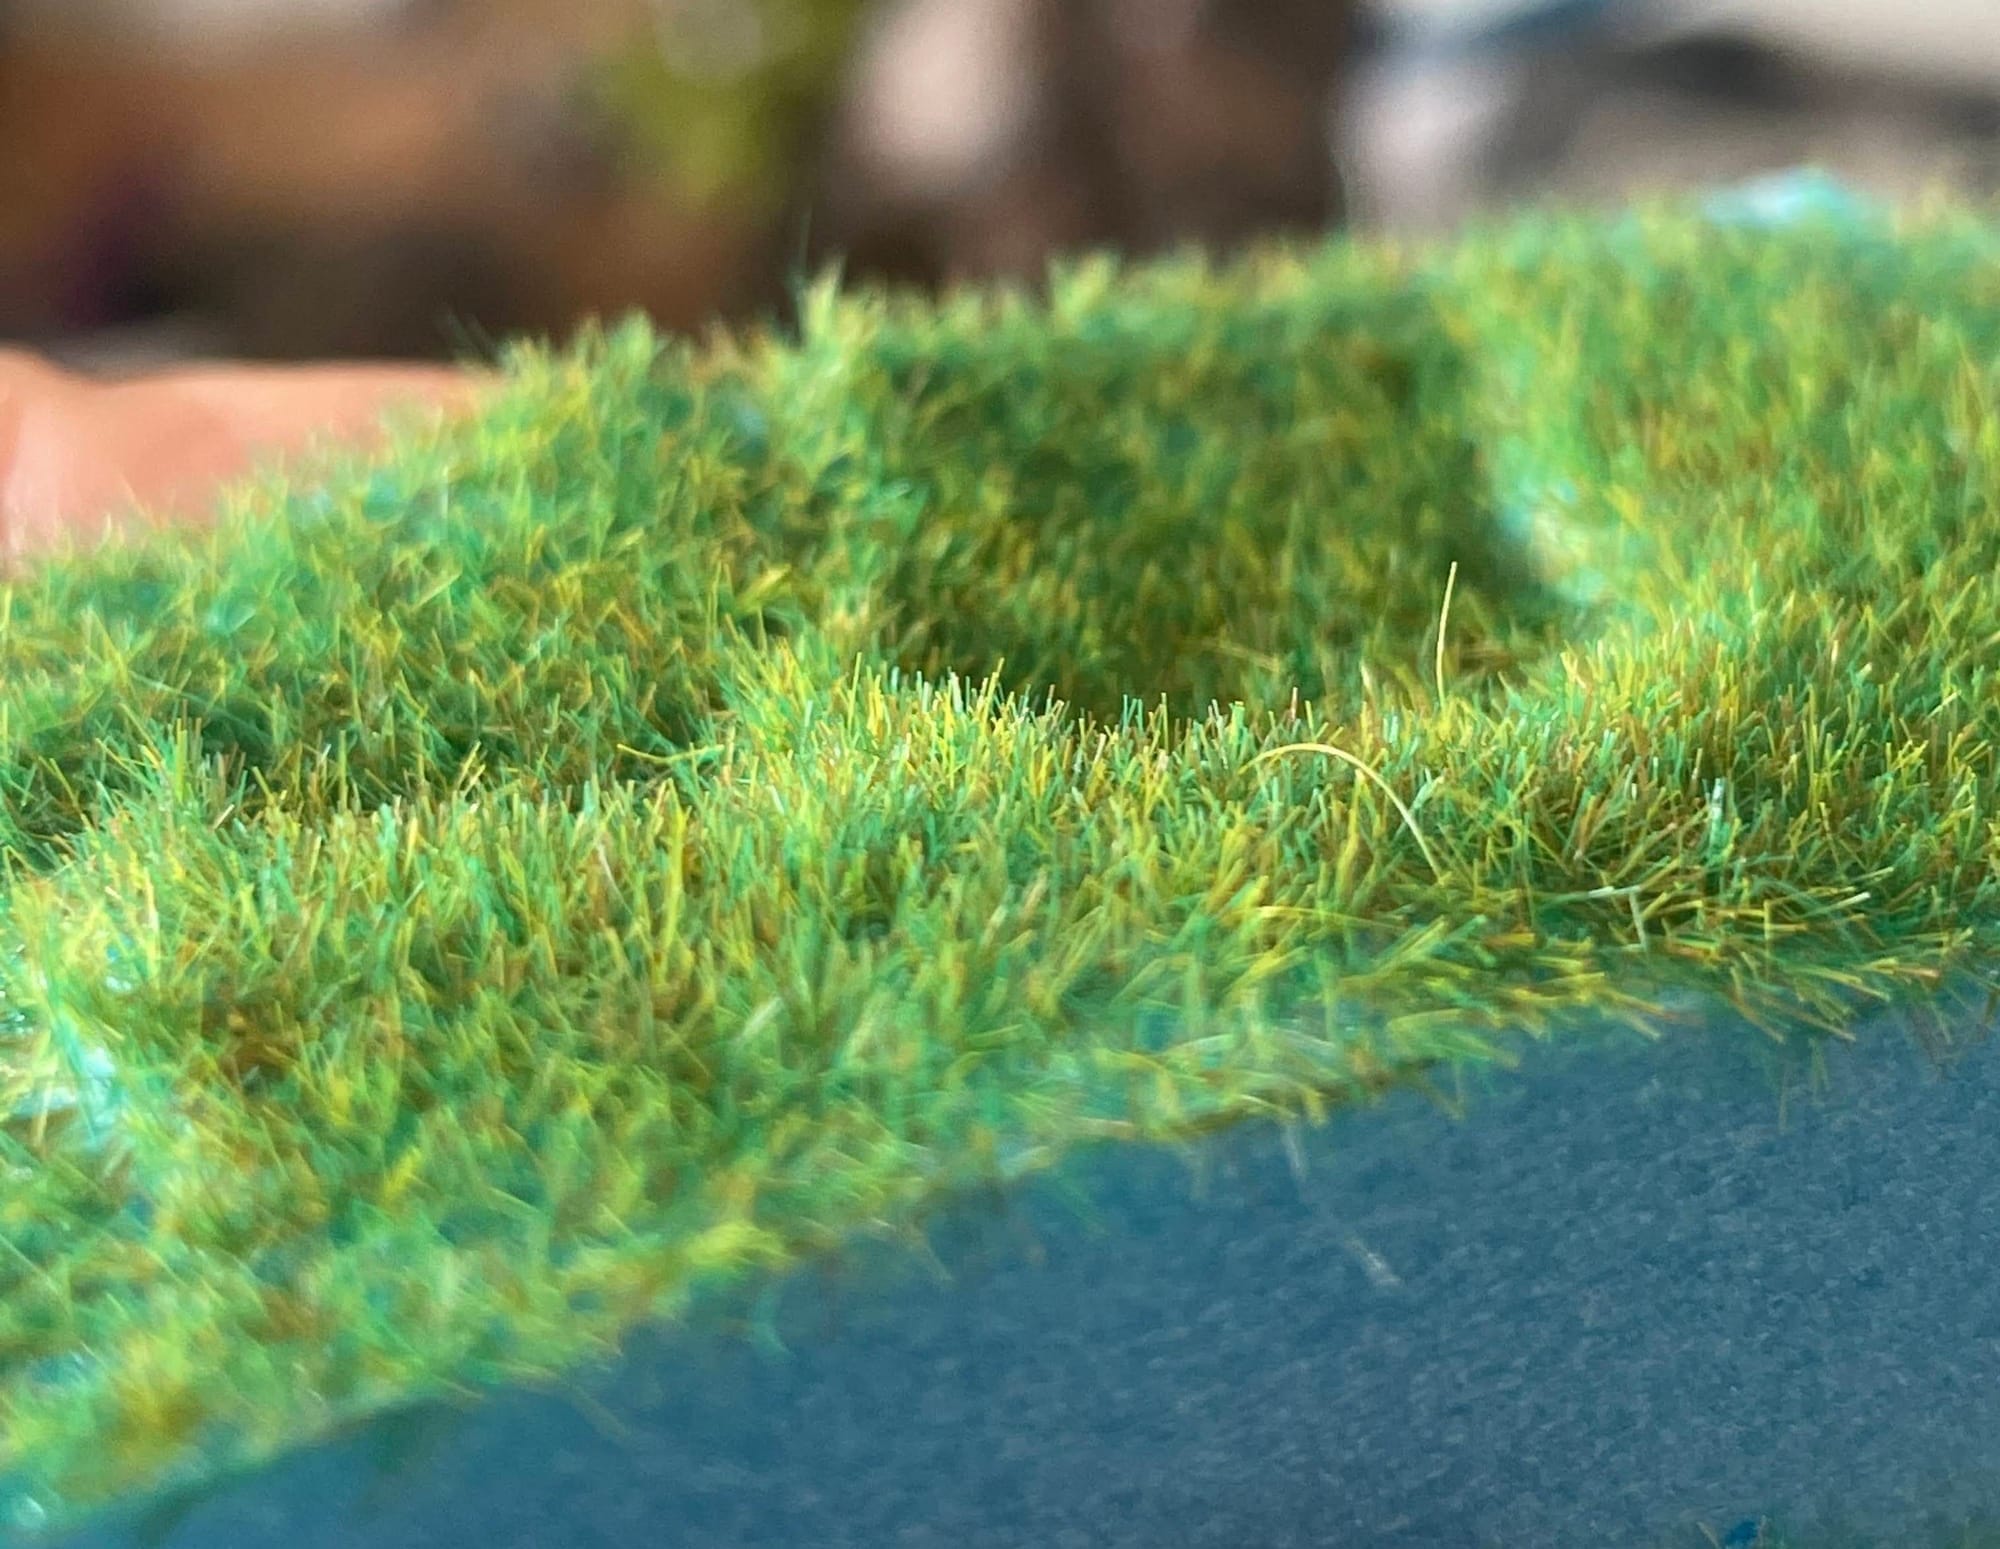
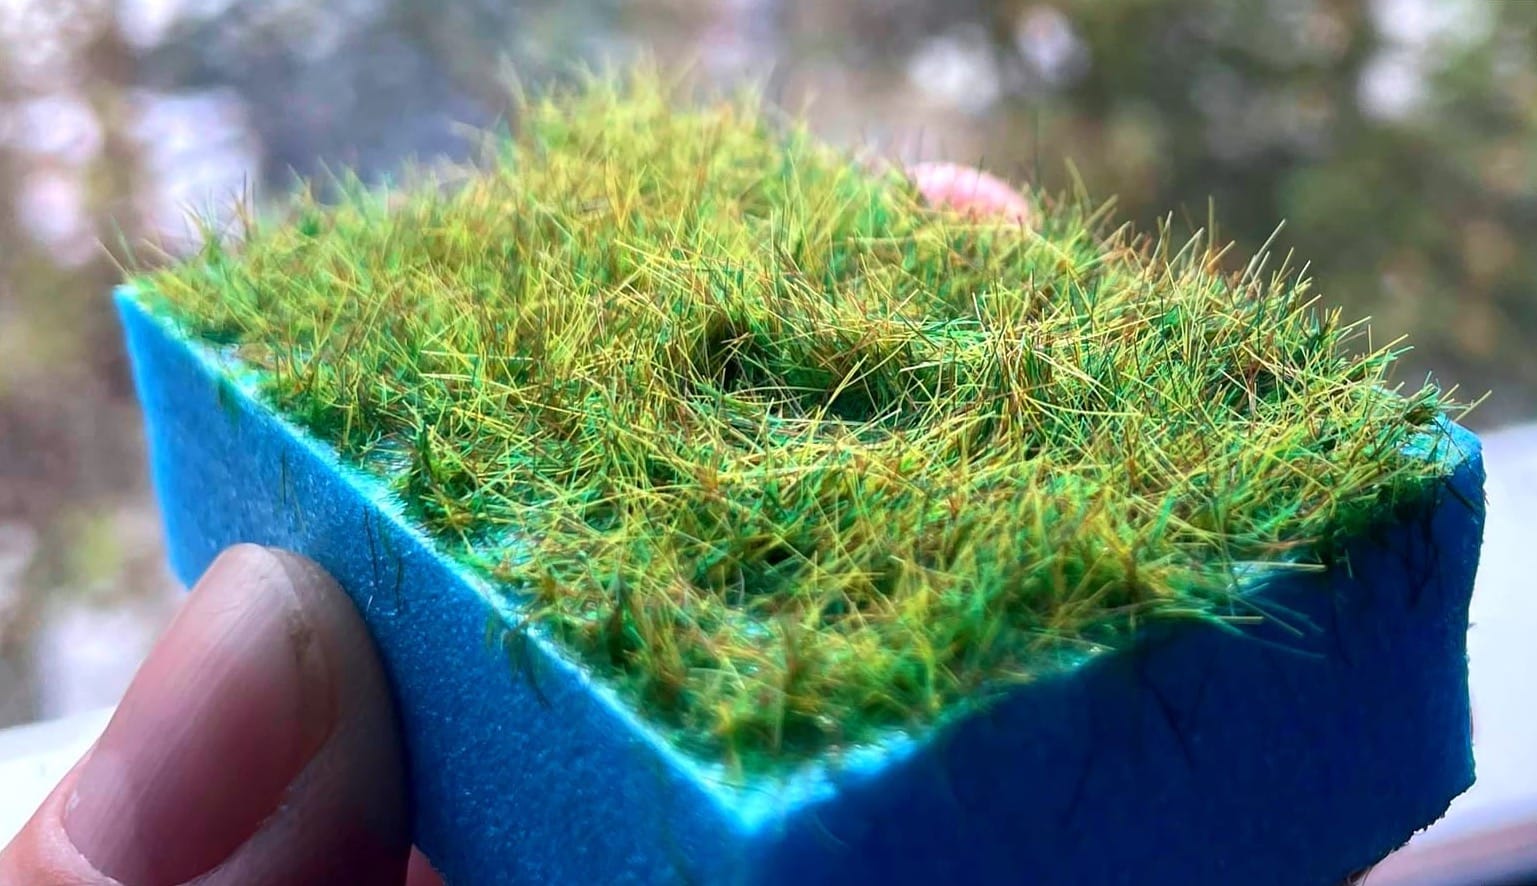
No static applicator | single layer of 2mm spring | triple layers of 2mm summer + 4mm spring + 6mm wild meadow
I was super excited by the 3-layer rendering, however I decided not to go that far on my diorama: even though I had not attempted to respect any scale, the grass length builds up when you layer them and it felt too high compared to the size of my tree.
So I chose to only use two layers: 2mm summer as a base, and 4mm spring on top.
As I went on to apply the grass, I realised I had made another mistake very early on in my build: I had « planted » my tree in the plaster.
I thought it was the best way to include it in the diorama, as I wanted its roots to be hidden in the ground.
As a result, I had to protect it with paper to make sure it did not collect static grass all over that would have been annoying to remove, and it prevented me to properly sprinkle my grass on the ground below for a large area of the diorama.
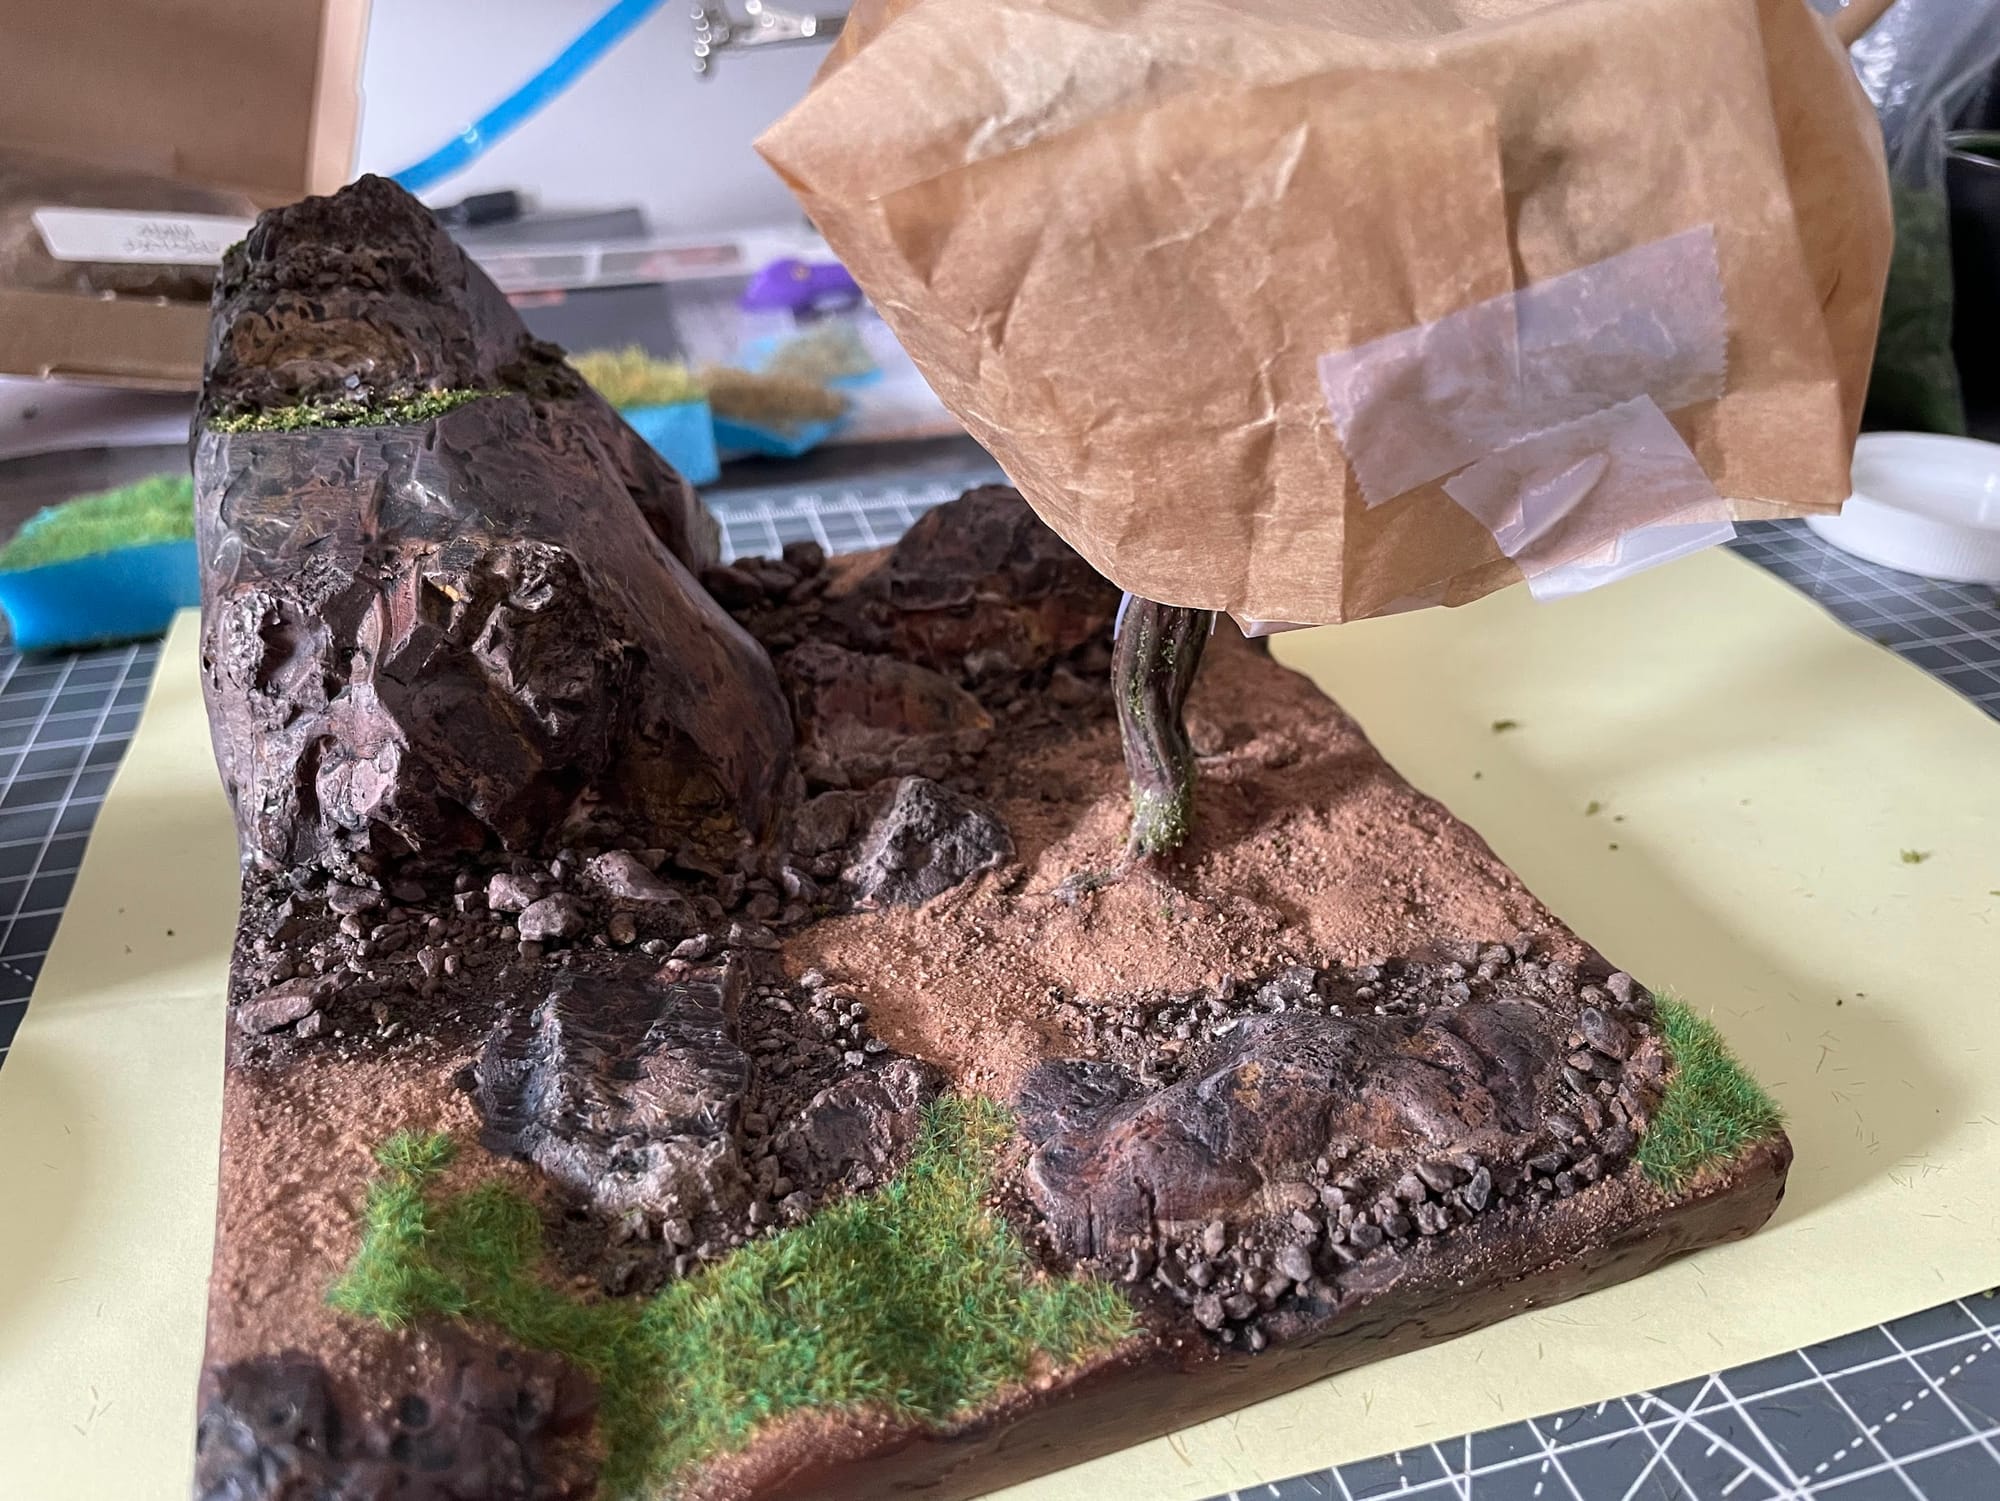
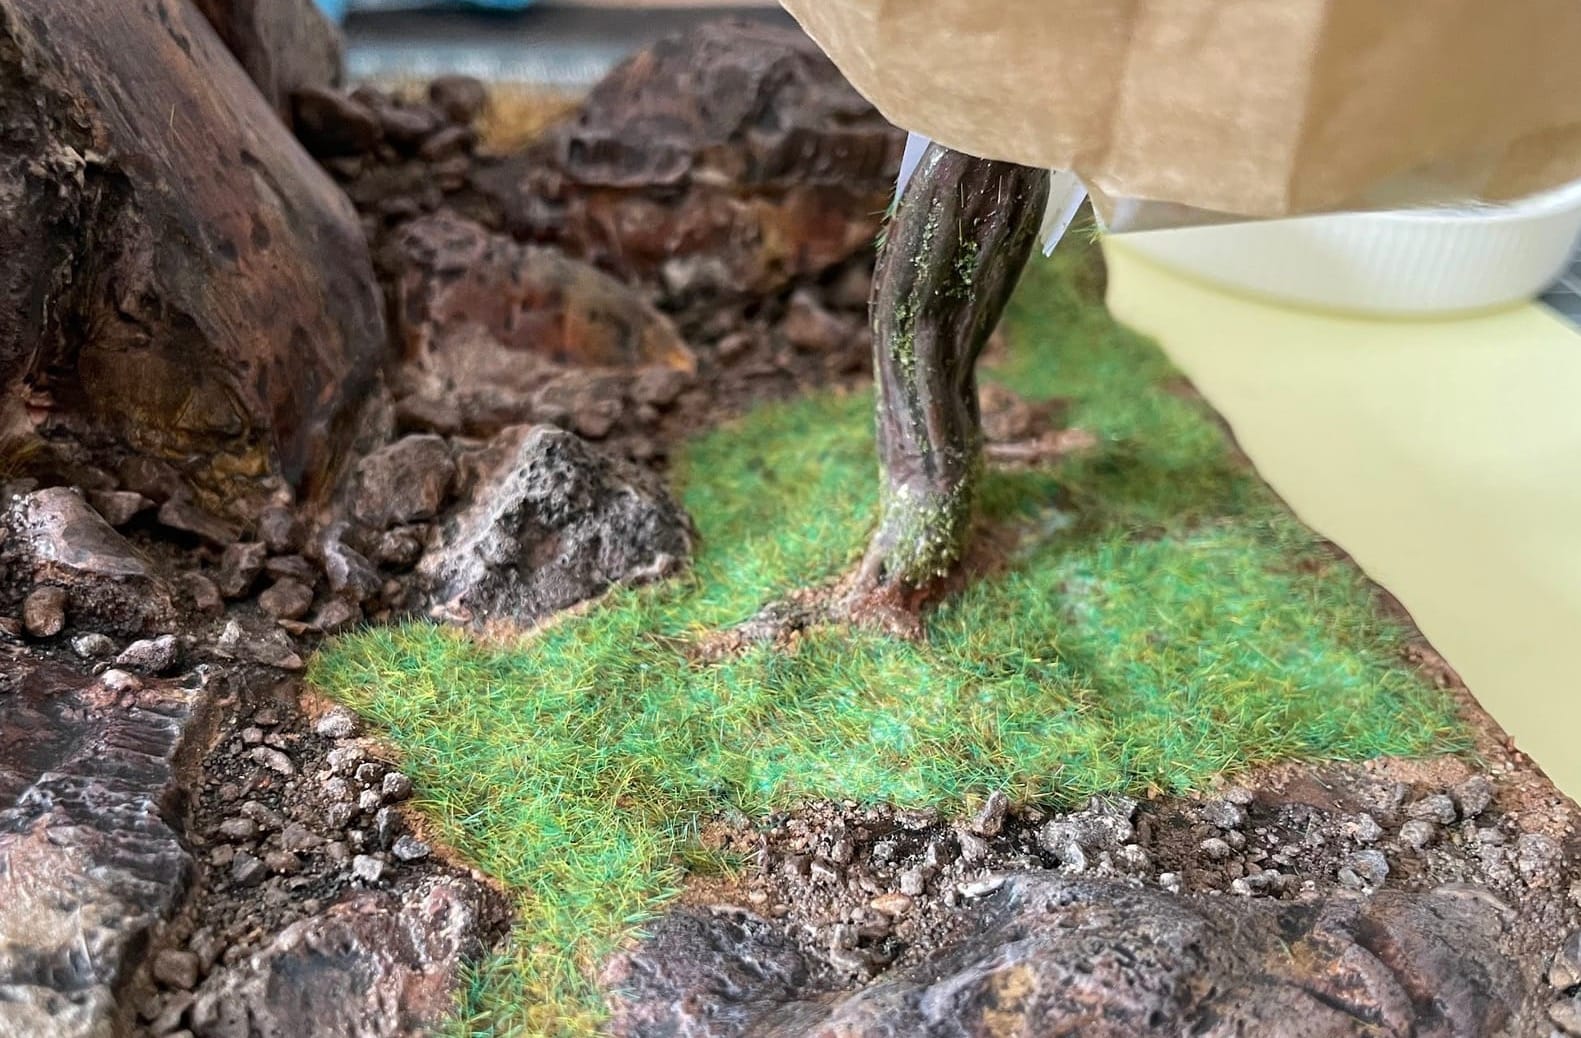
The grass is quite flat in the areas surrounding the tree
Next time, I’ll definitely find a way to place the tree as one of the last steps.
I’ll do better next time!
I haven‘t even listed everything I am not happy with in this diorama!
But the truth is, I really like it and the final result I managed to get to.
As I built it, I constantly repeated myself two things:
- Trust the process
Going from a few blocks of blue styrofoam to a finished landscape requires a lot of trust in the processes and techniques we’re applying. And the closer you get to the end, the more you’ll think « OK, it’s not time to ruin everything now! » 😅
It helped me a lot to remind myself that I was following proven techniques, even if I improvised here and there, and that intermediate steps were just that: steps that would get me to the desired result. - It won’t be perfect, and it’s OK
I’m a bit of a perfectionist, and that’s probably one of my biggest blockers when doing anything artistic.
As I created this first diorama, I intentionally repeated myself that I was OK with the end-result not being perfect. After all, my first objective was to learn!
Accepting that mistakes will be made and that they’re part (essential, even) of the learning experience was really key for me to get through the whole thing!
As it’s now done, I have one certainty: I’ll do better next time!
Until then, I hope it was useful to you to read more about what I learned along the way.
If you liked what you read, subscribe and you’ll get my next posts in your inbox!
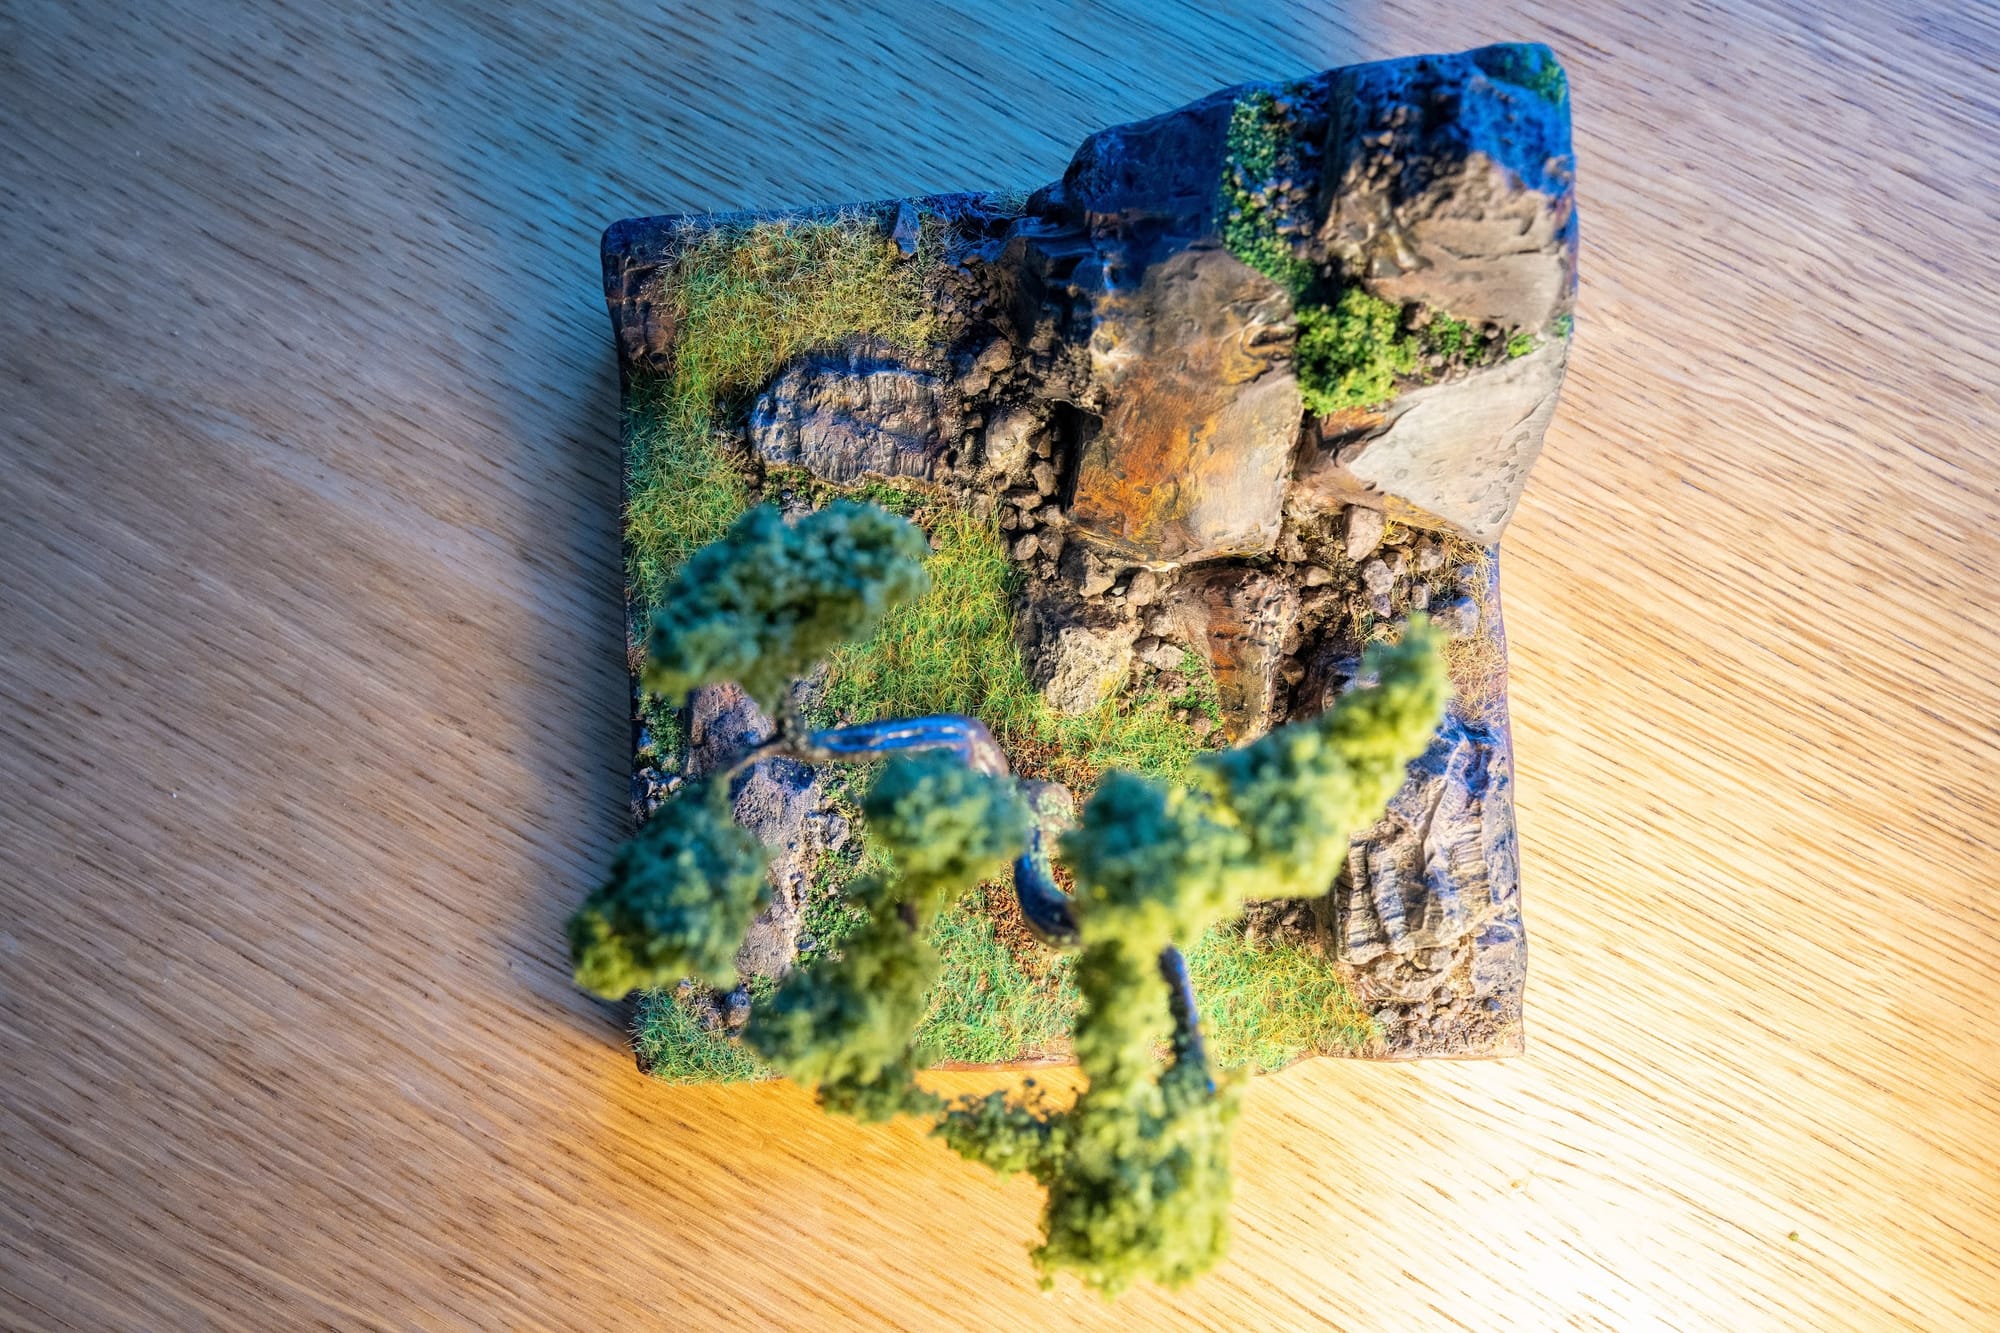
Finally, here are a few pictures of the final result:

Materials used
As an Amazon Associate, I earn from qualifying purchases.
- Tree
- 22 gauge artistic wire
- Super Sculpey medium blend
- Acrylic paints
- Light green coarse turf flock from Woodland Scenics (foliage)
- Green fine turf flock from Woodland Scenics (moss on trunk & branches)
- Spray adhesive / Noch Spray and Fix (61152)
- Landscape modelling:
- Dense styrofoam boards
- Hot wire foam cutter
- A glue gun
- PVA glue, Isopropyl alcohol, water
- Finishing plaster, but probably better to use some Plaster of Paris or Plaster Filler
- For the rock faces:
- Natural rocks
- Plaster of Paris
- Plastiline plasticine modelling clay
- Pebbles of different sizes, sand
- Acrylic paints: Raw Sienna, Burnt Umber, Yellow Ochre, Black
- Green fine turf flock from Woodland Scenics (for moss/small vegetation)
- Grounded tree bark & dry leaves for added details
- Static grass
- WWScenics Pro Grass Micro starter kit
- Includes a static grass applicator & pouches of:
- 2mm summer grass
- 4mm spring grass
- 4mm autumn grass
- 6mm wild meadow grass
- Includes a static grass applicator & pouches of:
- WWScenics Pro Grass Micro starter kit